Back-to-School Freezer Meal Prep | Easy Breakfasts, Healthy Snacks, and Lunchbox Staples
I’m diving into a full day of back-to-school meal prep to stock our fridge and freezer with healthy, homemade snacks, easy grab-and-go breakfasts, and lunchbox staples. My goal? To make school mornings smoother by prepping as much as I can in one day.
If you’re here looking for simple, nourishing recipes to support your busy routine, you’re in the right place. Some of the recipes I’m making are tried-and-true favorites, but a lot of them are brand new.

Here’s the Breakdown: This Week’s Kitchen Roundup
- Chewy Seedy Granola Bars: A favorite! These no-bake bars are sticky, crunchy, and freezer-friendly.
- Chocolate Peanut Butter Energy Bites: Tastes like a treat but packed with protein and healthy fats.
- Homemade Soft White Bread: Great for school sandwiches and making your own Uncrustables.
- Homemade Uncrustables (Freezer-Friendly): A step-by-step walkthrough using freshly baked bread.
- Copycat Blueberry RX Bars: A delicious and nutritious grab-and-go snack.
- Copycat Iced Oatmeal Z Bars: A wholesome twist on the popular Clif Kid Z Bars.
- Whole Wheat Carrot Applesauce Muffins: Perfect for fall—and freezer-friendly too!
- Sausage, Egg & Cheese Muffins + Homemade Breakfast Sausage Patties: Ideal for busy mornings!
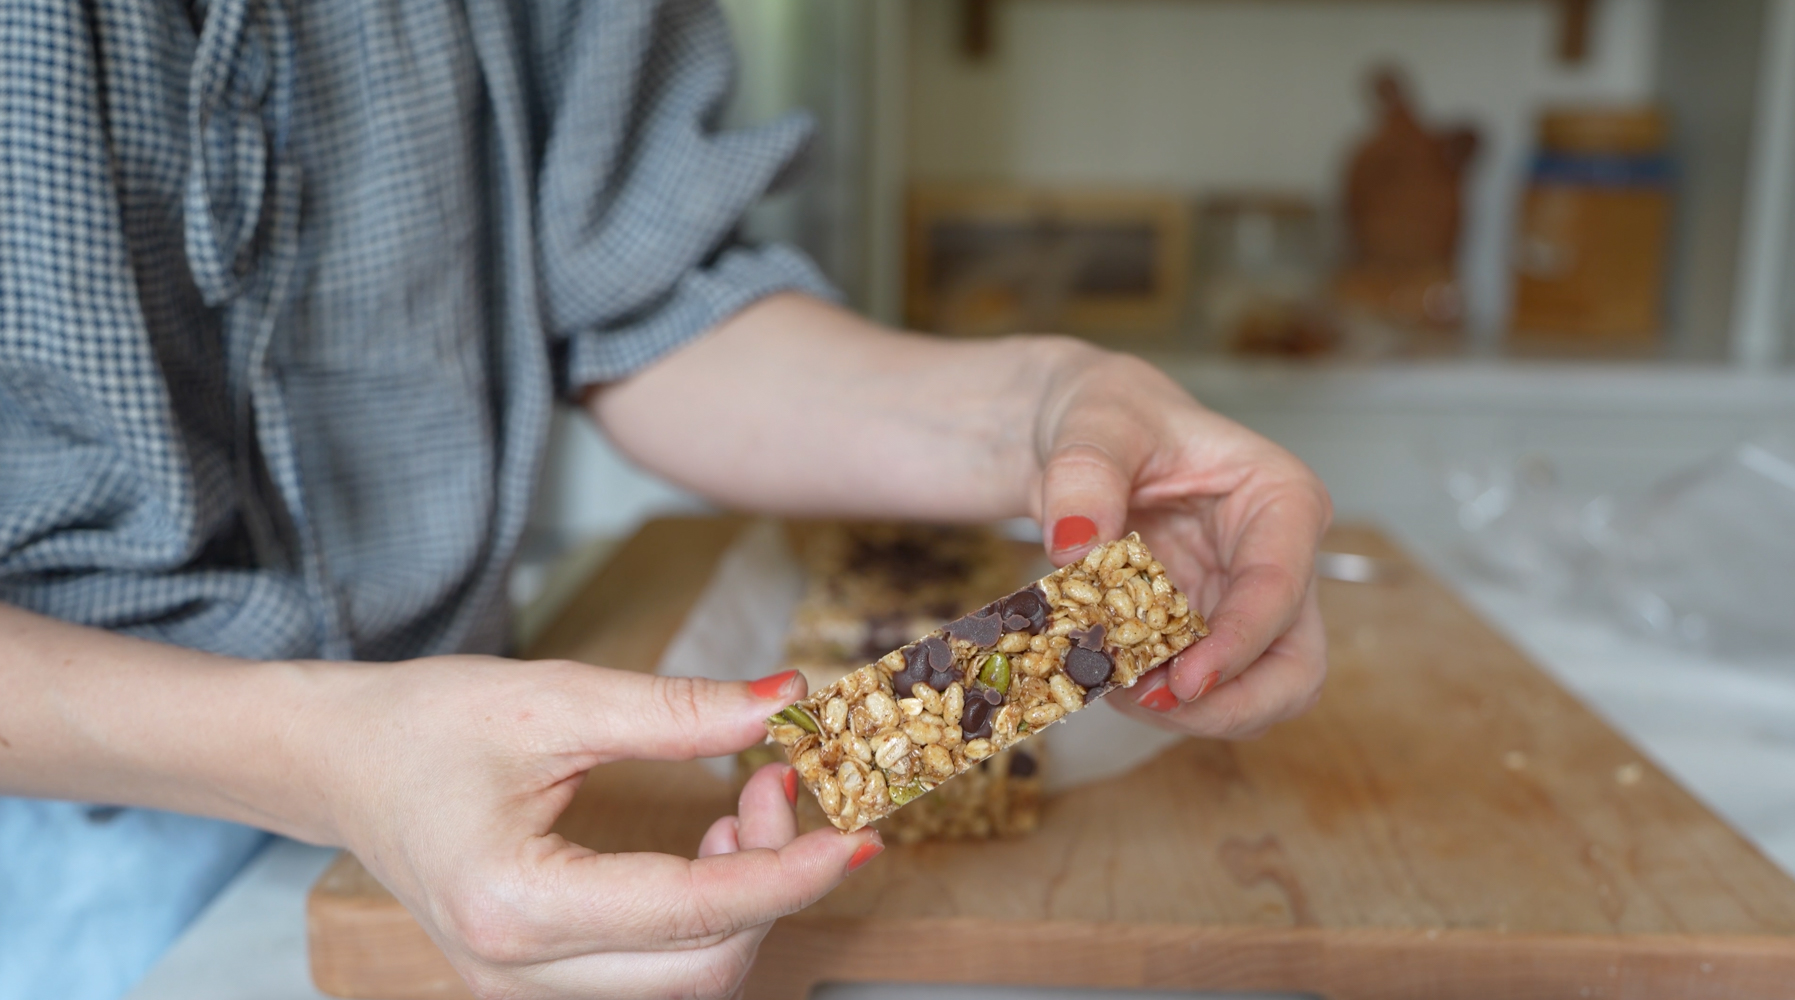
Chewy Seedy Granola Bars
We’re starting off with a favorite around here! This one’s already a hit and has become a regular in our snack rotation. It’s chewy, just sweet enough, and packed with wholesome ingredients. You can find the full recipe here: Healthy Homemade Snacks for Kids
Start by melt buttering, brown sugar, and honey on the stovetop over medium-low heat to form a syrup. Then stir in salt, cinnamon, almond butter (or a substitute), seeds, and vanilla. Once smooth, mix in rolled oats until well coated, then fold in rice cereal for added crunch.
Press the mixture firmly into a parchment-lined loaf pan — I love using a Pullman pan for this because it gives the bars a perfect shape and size. Sprinkle chocolate chips over the top, then pop it in the freezer to set. Once it’s firm, slice into bars and wrap them up for easy grab-and-go snacks.
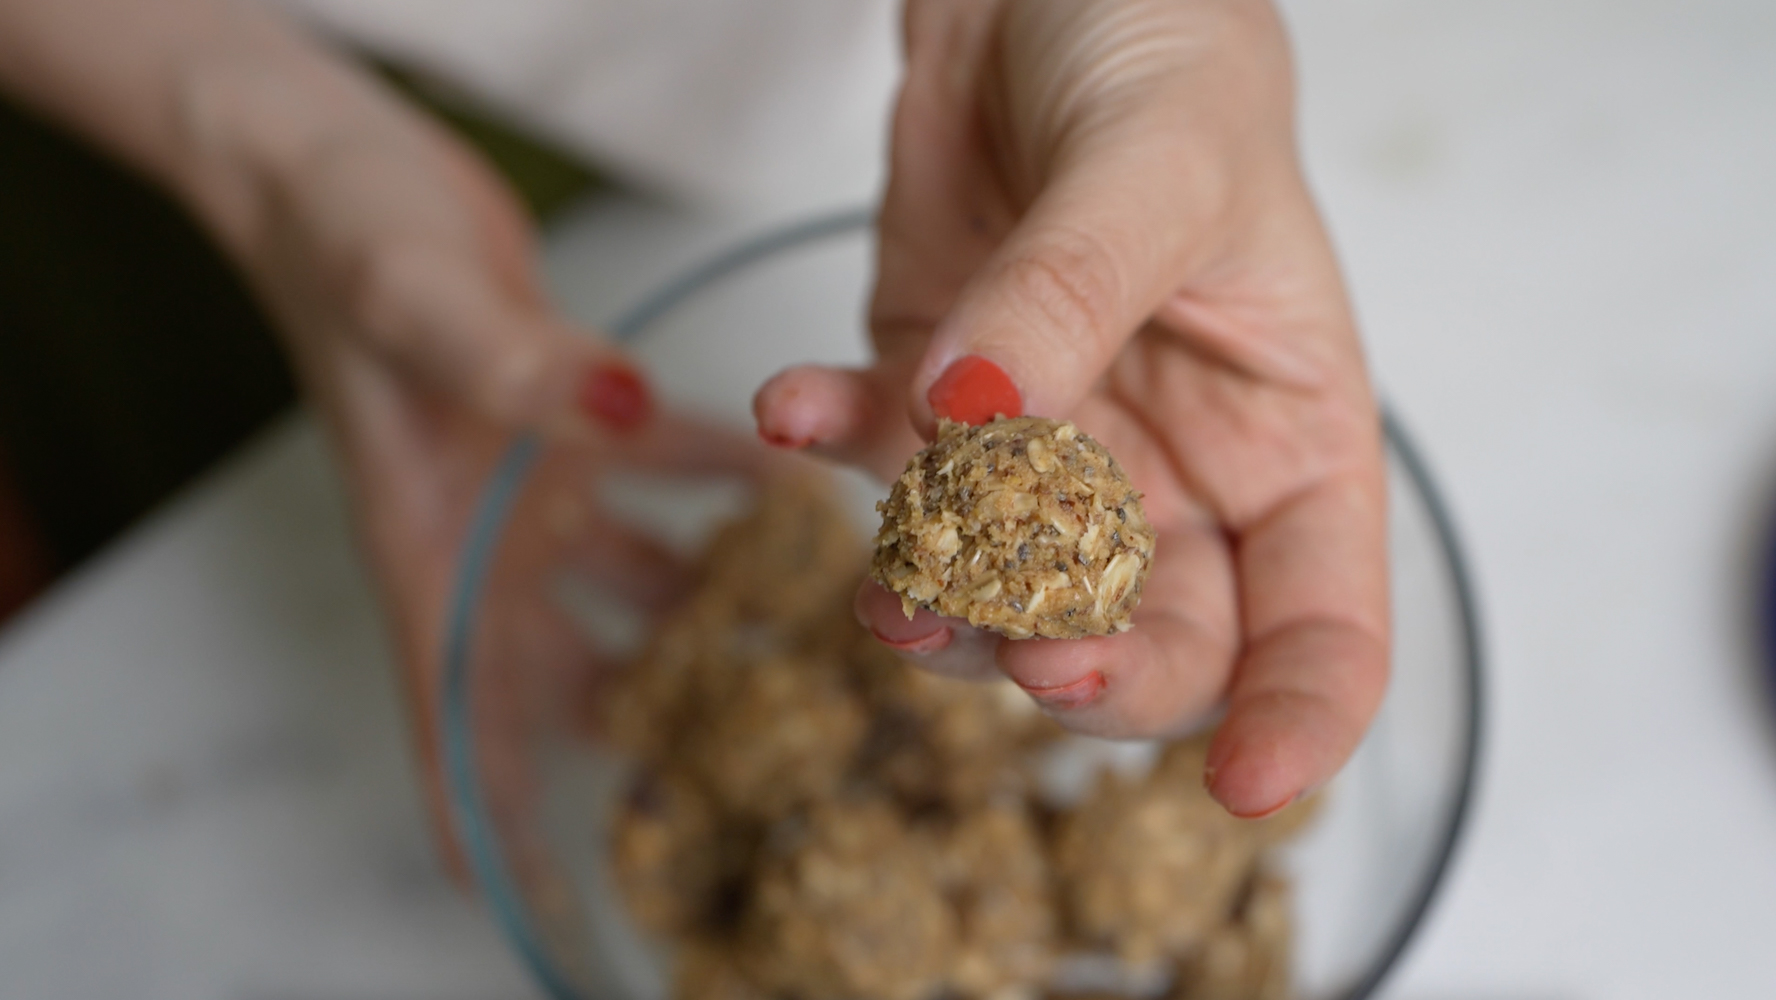
Chocolate Peanut Butter Energy Bites
This is one of those super quick and easy recipes that’s perfect for keeping healthy snacks on hand. These no-bake protein bites are made with wholesome ingredients and a boost of protein, and my daughter says they taste just like chocolate peanut butter cups—which is the ultimate win in my book!
This recipe is modified from Minimalist Baker’s No-Bake PB&J Energy Bites – you can find the original version here. I just made a few tweaks to better suit our preferences!
I started by mixing together creamy peanut butter and maple syrup, then added chia seeds and my favorite protein powder — I used Clean Simple Eats in Simply Vanilla flavor (you can find it here and use code CHRISTINESNOTEBOOK for 10% off).
To boost the nutrition, I stirred in ground flax seed until the mixture was smooth. After that, I folded in one and a quarter cups of rolled oats along with a generous sprinkle of chocolate chips — I skipped the craisins from the original recipe, and honestly, I didn’t miss them at all.
Finally, I shaped the mixture into small bite-sized balls and placed them in the freezer to store. These make the perfect grab-and-go snack,
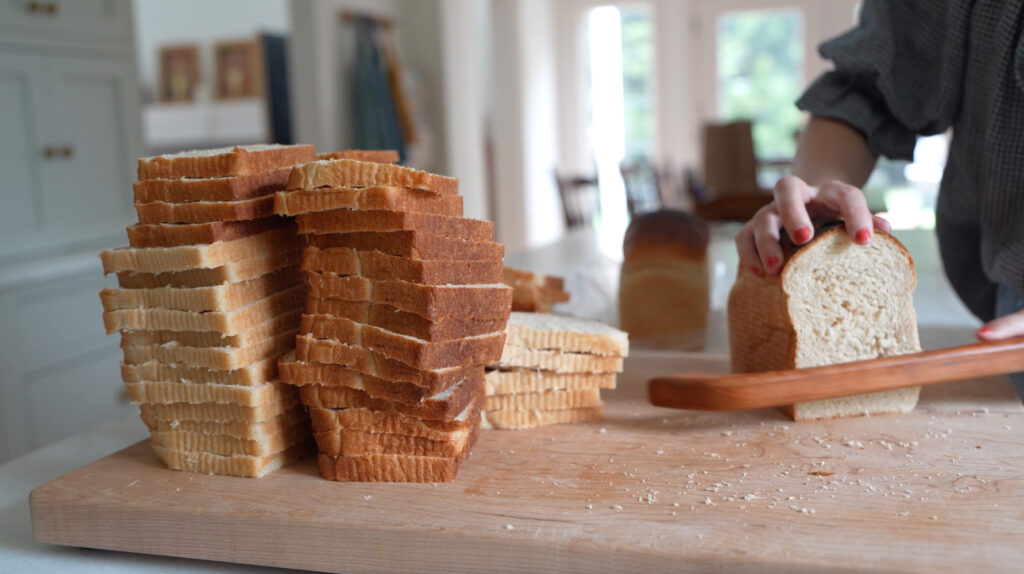
Homemade Soft White Bread
I decided to make a soft white sandwich bread—perfect for freezer-friendly Uncrustables and school lunches. I skipped sourdough in favor of a yeasted dough, which has a more neutral flavor and is ideal for picky eaters. I added a bit of nutrition by using half freshly milled hard white wheat flour alongside all-purpose flour.
To help keep the bread extra soft, I made a tangzhong—a thick paste of water, milk, and flour—cooked on the stove before being added to the dough. It adds moisture and extends freshness. I used my Ankarsrum mixer to handle the large batch, though I really pushed its limits with this one! I followed Claire Saffitz’s Uncrustables bread recipe from this video and multiplied it by five. If you’re new to homemade bread, I recommend starting with a single loaf before scaling up like I did.
After mixing and the initial rise, I shaped the dough by flattening each portion into a rectangle, rolled it up tightly while adding a bit of tension, and made sure the dough fit snugly in the pans. Then I covered the loaves with plastic wrap and let them rise again until the dough reached near the top of each pan.
Once they were ready, I preheated the oven to 350°F and set a timer for 35 minutes. My goal was to bake until the internal temperature reached 190°F, which ensures the loaves are fully cooked but still soft inside. One of the loaves needed just a little more time to rise fully, so I gave it a few extra minutes before baking.
The loaves turned out beautifully—pillowy, golden, and perfect for slicing and freezing!
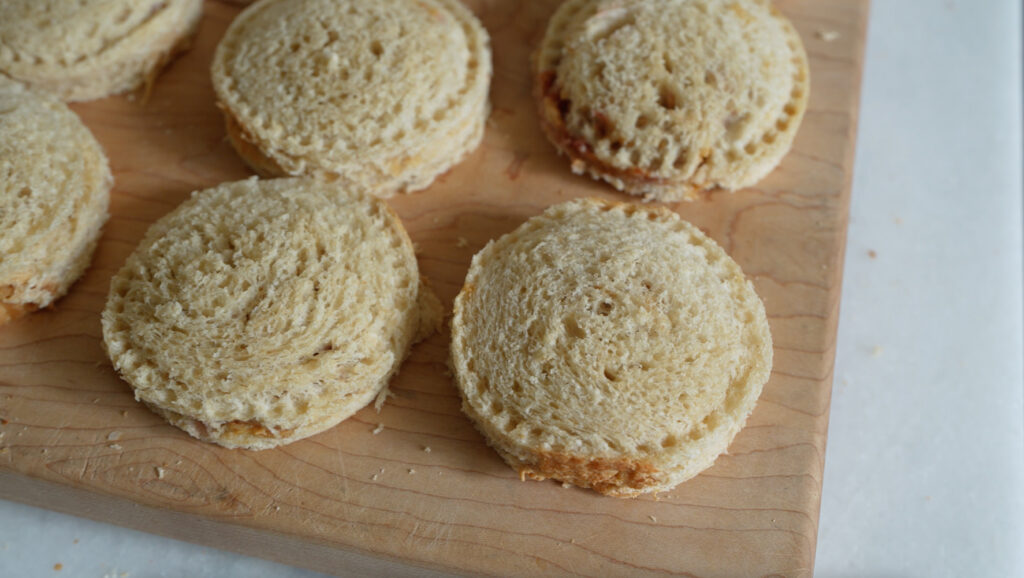
Homemade Uncrustables with Freshly Baked Bread
One of my main goals for this back-to-school prep session was to stock the freezer with a big batch of homemade Uncrustables — those soft, sealed peanut butter and jelly sandwiches that make lunchbox packing a breeze. To make them extra special (and more nourishing), I used the homemade soft white sandwich bread mentioned above. It added the perfect tender texture and wholesome flavor that store-bought bread just can’t match.
The Method:
I used this Uncrustables cutter from Amazon, and it worked great! The key is to spread peanut butter on both slices of bread, then add a dollop of jelly in the center. To help the sandwich seal properly, I brushed a little water around the edges—just like you would when making ravioli. The cutter has two parts: one to cut out the circle and another to press and seal the sandwich.
A few notes:
- If you’re using homemade bread made with freshly milled flour, it can be a bit more delicate and crumbly, so work carefully.
- A wider loaf pan (like 5×9”) might help avoid bits of crust sneaking into the final sandwich, but I like my 4×9” pans because they result in less waste.
- The results improved with each sandwich I made—so don’t worry if your first few aren’t perfect!
Once all the sandwiches were sealed, I wrapped them individually in plastic wrap, stored them in a large freezer-safe bag, and popped them into the freezer. These will stay fresh and can be added directly to a lunchbox in the morning—they’ll thaw by lunchtime, making them the perfect grab-and-go lunch option.
And don’t worry—none of the bread went to waste. All the leftover scraps or slices with holes will be used for toast and sandwiches throughout the week!
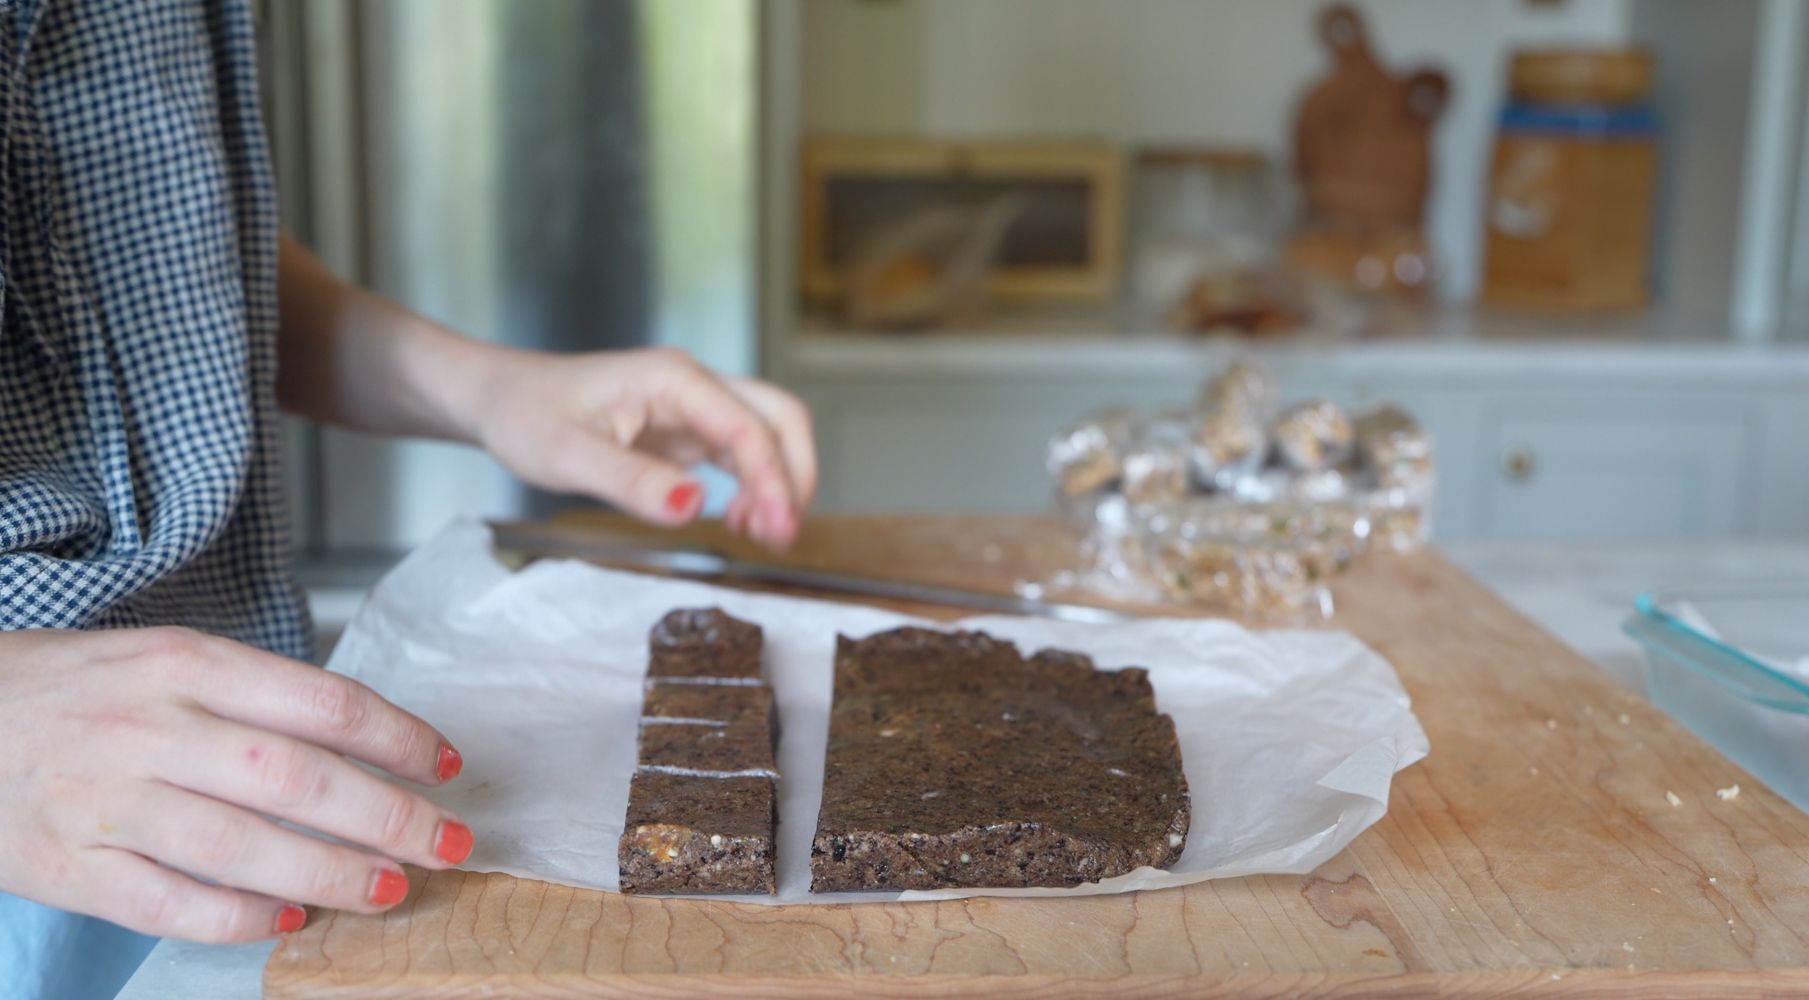
Homemade Copycat Blueberry RX Bars
Lately, I’ve been totally hooked on the blueberry RX bars, so I set out to make a homemade version. I found a promising copycat recipe and gave it a few personal tweaks to see if I could get close to the real thing. Spoiler alert: after a quick taste test, they turned out incredibly close! They’re chewy, packed with flavor, and make the perfect healthy grab-and-go snack. This one’s definitely a keeper. The recipe was adapted from VeggieBalance.
A few notes:
- You can dehydrate your own blueberries at home for an even fresher taste—try drying wild blueberries at low oven heat over several hours.
- Handle the food processor blades with care—they’re very sharp!
In a food processor, blend the dates until smooth—just make sure to remove any stray pits first! Then add almonds and a scoop of egg white protein powder for a nice protein boost. I used this one and it worked perfectly. Be sure to pulse the almonds just enough to leave some small chunks intact—this helps mimic the signature chewy texture of the original RX bars.
The mixture was a bit dry at first, so I gradually added water and a touch of vanilla extract to help everything come together perfectly. Then came the best part—folding in the blueberries, which filled the kitchen with an amazing aroma.
When it came time to press the mixture into a pan, I tried smoothing it with my hands and then a measuring cup—but the easiest method was using parchment paper. Placing parchment over the top made it simple to get a smooth, even surface. Once firm, I’ll cut them into perfect little bars ready to grab on the go.
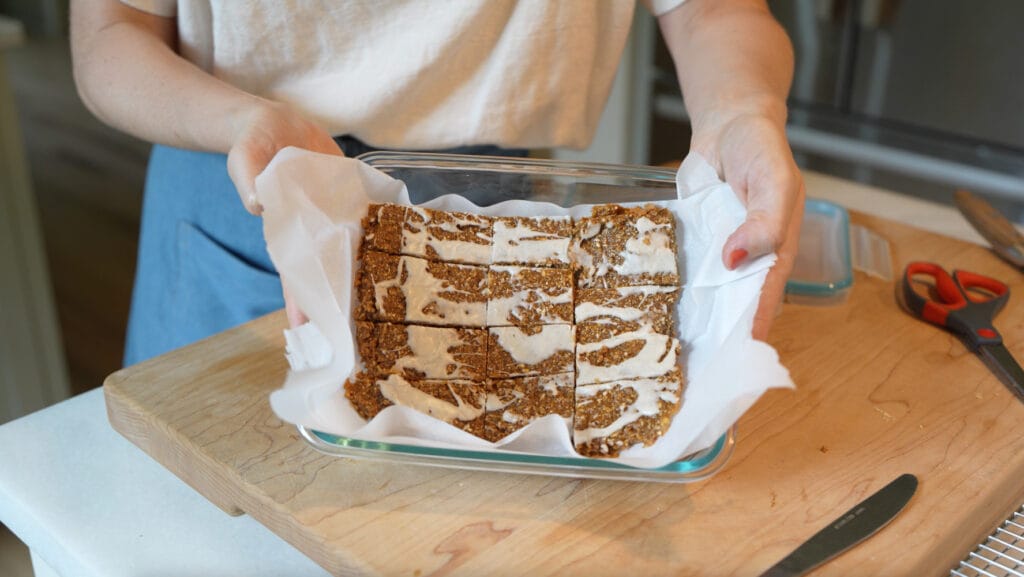
Copycat Iced Oatmeal Cookie Z Bars
Next up, I tackled a batch of copycat iced oatmeal cookie Z bars—a favorite in our house since my kids love the store-bought version. I was excited to try this homemade twist, especially because the original recipe uses a mix of natural sweeteners and even dried figs—an ingredient I don’t typically bake with. That unique combination had me extra curious to see how they’d turn out, and spoiler: they did not disappoint!
The process begins by pulsing most of the ingredients in the food processor until fairly smooth, then adding an extra cup of oats at the end to give the batter a bit more texture. I spread the mixture onto a parchment-lined baking sheet, about ½-inch thick. It doesn’t need to cover the whole pan—just aim for a neat rectangle. I found that greasing the back of my spatula with coconut oil helped a lot with spreading it evenly.
The bars bake at 350°F for 11–13 minutes.
To finish them off, I added a simple vanilla icing made with powdered sugar, water, and some vanilla extract. You can pipe it on using a Ziploc bag with the tip snipped off for a nice zigzag pattern, or just smear it on like I did. After that, I let them cool completely before cutting into bars.
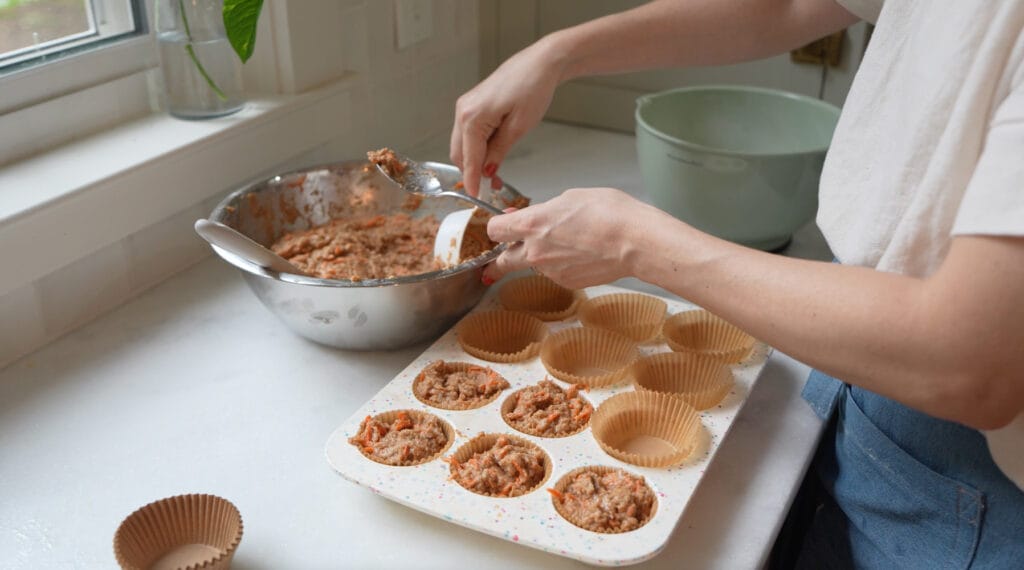
Carrot Applesauce Muffins
I’ve made this recipe before and absolutely loved them! This time I doubled the recipe and used freshly milled hard red wheat flour for added nutrition and flavor. The combination of applesauce, carrots, and warm spices makes these muffins taste like fall in muffin form—perfect for school snacks or a quick breakfast. You can find the full recipe here from 100 Days of Real Food, which uses only real, wholesome ingredients—no refined sugar and no weird additives.
The process is simple:
- Melt butter
- Mix the batter
- Fold in shredded carrots and unsweetened applesauce
- Bake at 350°F for 22–25 minutes
After baking and letting them cool completely, I flash-froze the muffins on a tray for about 2 hours. This step is super helpful for long-term storage—you can then place them all in one container without worrying about them getting smooshed. I used these muffin liners to make cleanup easier and to keep the muffins perfectly shaped. Now I have a stockpile of delicious muffins in the freezer ready to go anytime!
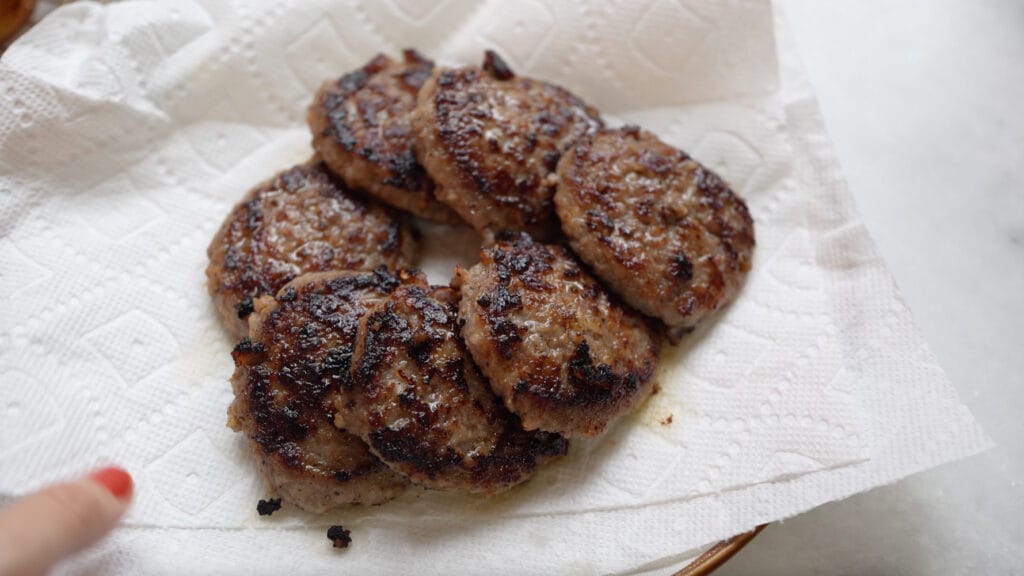
Sausage, Egg & Cheese Muffins + Homemade Sausage Patties
To round out the prep with something savory, I made a batch of sausage, egg, and cheese egg muffins—a great grab-and-go breakfast option that freezes well and reheats quickly. I also prepped homemade sausage patties, which are budget-friendly and easy to make in bulk.
I started with a bulk package of sausage and split it in half: one half was cooked into crumbles for the egg muffins, and the other half was pressed, flash-frozen, and sliced into patties before browning. (Pro tip: slightly freezing the sausage block for 1–2 hours makes it much easier to slice evenly—shoutout to a subscriber for that tip!)
For the egg muffins, I blended the following ingredients:
- 18 eggs
- A splash of milk
- 1 tsp salt
- 1 tsp onion powder
- ½ tsp black pepper
- About 1½ cups shredded cheddar cheese
In each muffin cup, I added a scoop of browned sausage crumbles and poured the egg mixture over the top—but quickly learned not to overfill them (lesson noted for next time!). For the second batch, I filled the cups a little less. After baking, I flash-froze the muffins for about 2 hours before transferring them to a freezer-safe container.
These little freezer-friendly breakfasts are a total win—both cost-effective and convenient for busy school mornings.

This post contains affiliate links, which means I make a small commission at no extra cost to you. As an amazon associate, I earn from qualifying purchases.
Thanks for all the ideas! I plan to make the bread soon. I recently found your YouTube channel and look forward to a new video every Wednesday. I am loving all the meal prep inspiration. Everything we have tried has been great.