Fluffy Honey Wheat Sandwich Bread | Made with 100% Freshly Milled Flour
A soft, fluffy, and delicious honey wheat sandwich bread made with freshly milled flour. This is my go-to homemade sandwich bread for my family. Great for making sandwiches or toast. Easy to make, dairy free, no complicated steps. I think you’ll love this one!
After making this bread many times, I have officially modified and improved this recipe as of Feb 28, 2026.
There’s nothing quite like the smell of fresh bread baking in the oven, and this Fluffy Honey Wheat Sandwich Bread using freshly milled grains is one of those recipes you’ll come back to again and again. With a soft, tender crumb and a slightly sweet flavor from honey, it makes the perfect everyday loaf. Whether you’re building sandwiches, serving it alongside tomato soup, or toasting it for breakfast, this homemade bread beats anything you can find at the store.
The best part? This bread is made with simple pantry staples and comes together with very little effort. The honey adds natural sweetness, olive oil keeps it moist, and freshly milled flour gives it a hearty yet light texture. Once you’ve baked your own loaf, you’ll see just how rewarding homemade bread can be.

Why You’ll Love This Recipe
- Soft & fluffy: Perfect for sandwiches and toast.
- Wholesome: Made with freshly milled whole wheat flour and natural sweetener.
- Beginner-friendly: No complicated steps, no sourdough starter, & the stand mixer does the hard work.
- Two loaves at once: One to enjoy fresh and one to freeze or share.
- Dairy Free: Using olive oil makes this dairy free and also helps it come together really quickly, no melting butter!

New to Freshly Milled Flour?
For a more comprehensive guide to working with Freshly Milled Flour, checked out my Beginner’s Guide to Freshly Milled Flour where I go over equipment, where to buy grains, how to store them, and more. I also go over this recipe in full detail in this video on youtube.
Ingredients Measured in Grams For Accuracy
I use and love this scale for all of my baking.
- 540 grams of room temp or warm water
- 110 grams olive oil
- 160 grams honey
- 16 grams sea salt
- 800 g (about 6–7 cups) freshly milled whole wheat flour, divided. I’m using 600 grams hard red wheat and 200 grams kamut for added nutrition.
- 1 Tbsp instant yeast
- 1.5 tsps apple cider vinegar. Apple cider vinegar gently strengthens gluten structure and improves rise and texture—especially in whole wheat dough.
A Note on Yeast
If you only have active dry yeast, you just need add the yeast at the beginning with the water, honey, and oil and make sure your water is warm to the touch. Your yeast wants a warm cozy temperature to BLOOM. Once that yeast looks foamy, add in your flours. You can also do this in a separate bowl with a little but of the water from the recipe and a big pinch of sugar. This is a really fast and reliable way to bloom your yeast. I store my yeast in the freezer to make sure it is always fresh.
Step-by-Step Instructions for Honey Wheat Sandwich Bread
1. Make the Dough: In the bowl of a stand mixer, combine the warm water, olive oil, honey, and yeast. Allow the yeast to bloom if needed. Then add the salt and apple cider vinegar. Add all of the flour and mix until just combined. Let the mixture rest for 10-30 minutes to hydrate the flour.
For best results, I recommend using a stand mixer like this one. It saves time and gives you perfectly kneaded dough that is gentle on freshly milled grains and develops that gluten naturally without the arm workout. Knead for about 10-15 minutes until smooth and elastic.
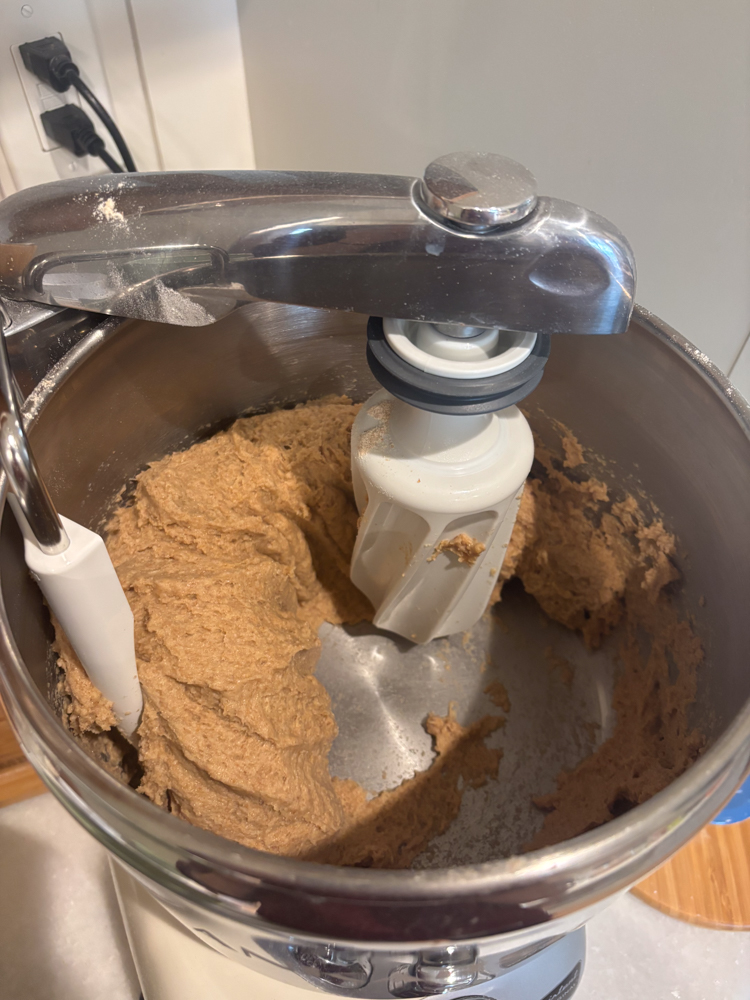 Mix the flour until just incorporated, then let it sit for 10-30 minutes.
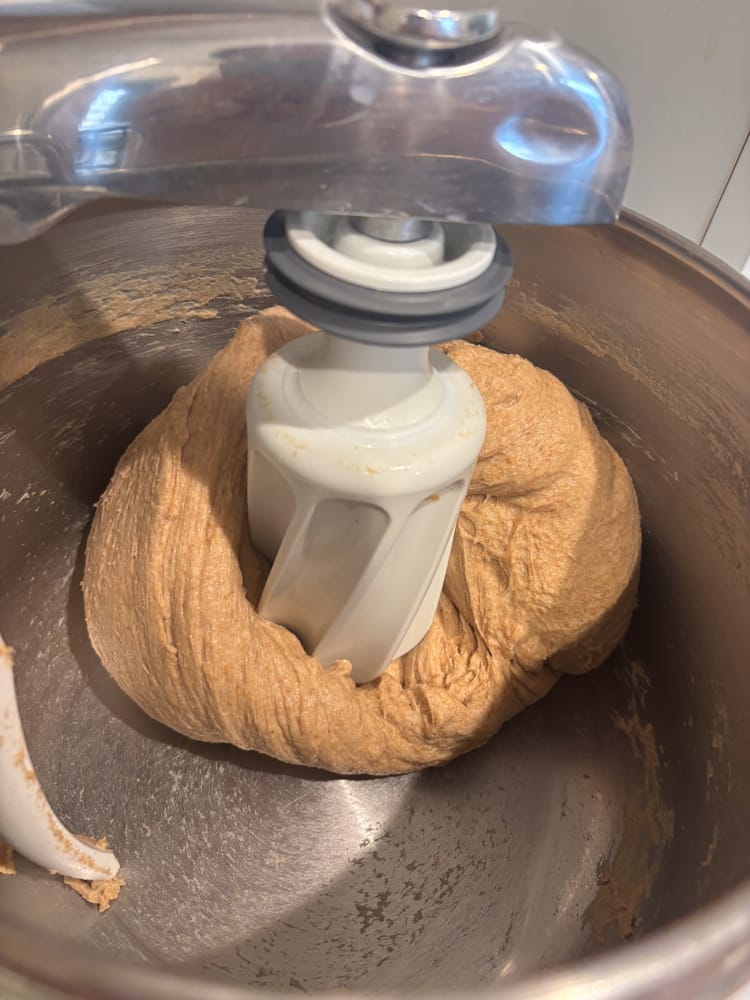 Knead for 10-15 minutes until more smooth and elastic.
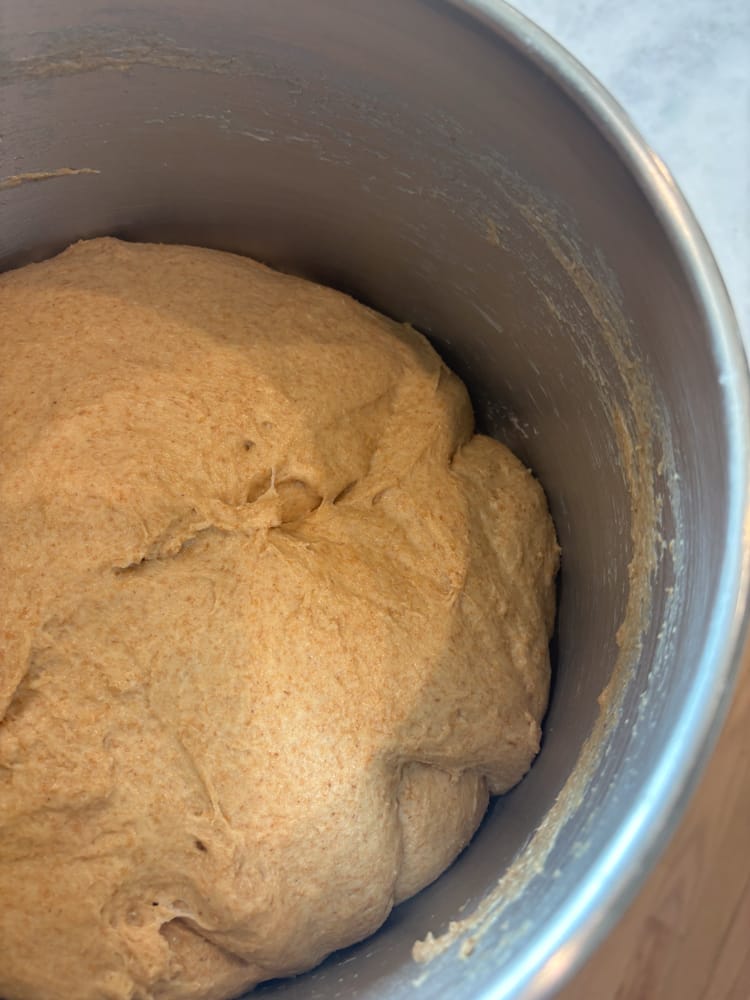 Let rise until doubled in size
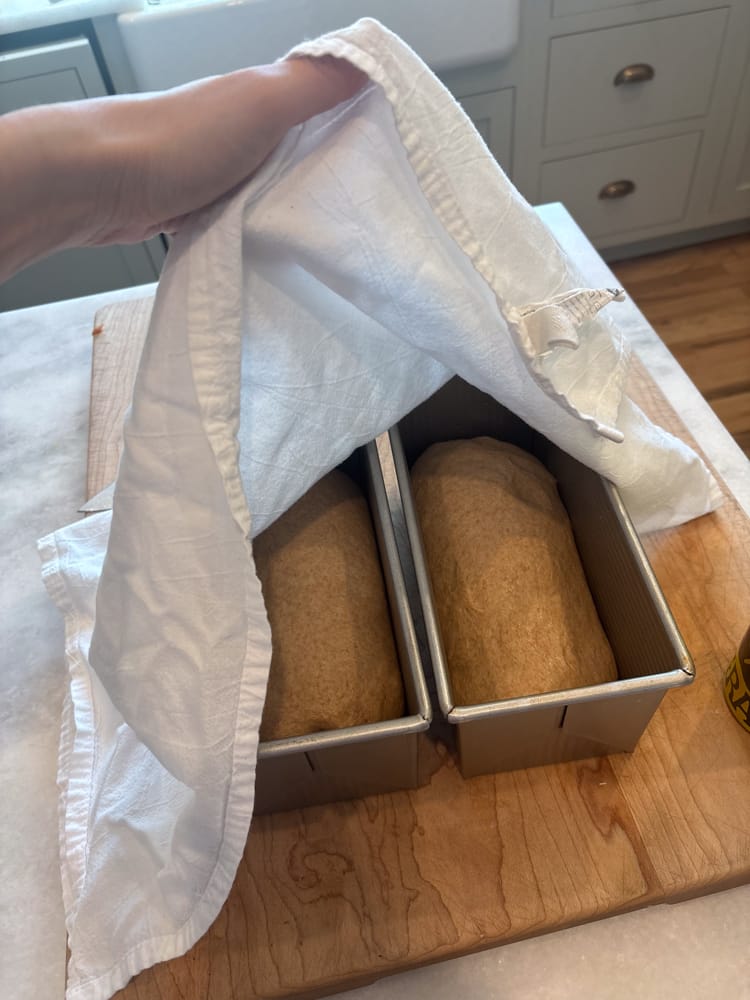 Shape into 9×4 loaf pans
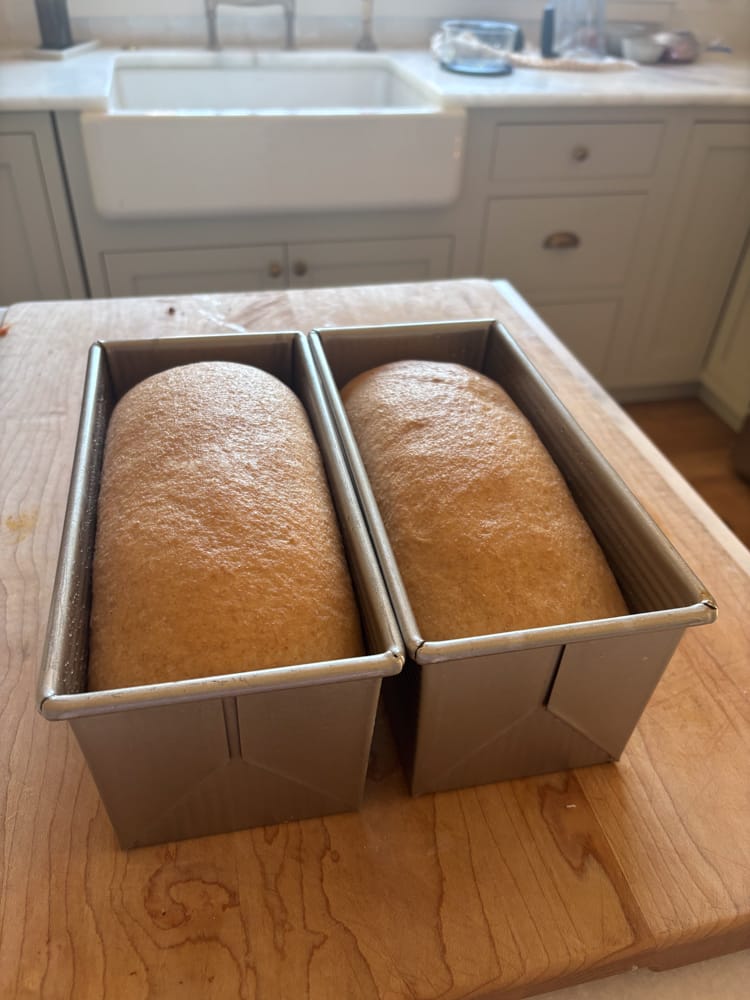 Allow to rise in pans.
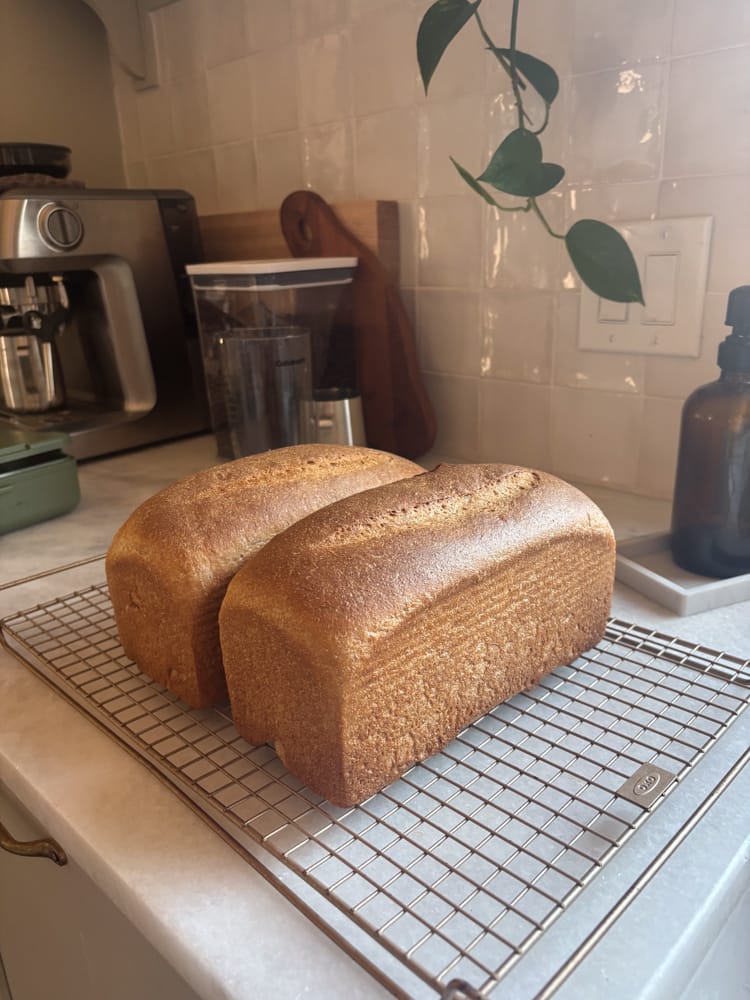 Bake!
Bake!
3. First Rise: Cover the bowl with a towel and let the dough rise until doubled in size, about 1-2 hours.
4. Shape Loaves: Punch down the dough, divide it in half, and shape into two sandwich loaves. Place them in greased 9×4 loaf pans and let rise for another 45 minutes.

5. Bake: Bake at 375°F for 5 minutes and then reduce to 350 and bake for 30 minutes or until golden brown and internal temperature reaches 190. I like to use 2 9×4 usa pans for this. Be sure to grease the insides well with some avocado or olive oil.
6. Cool & Slice: Cool completely before slicing to keep the texture soft and fluffy. For an extra touch, brush the tops with butter while they are still warm, it will make the tops soft and glossy.

Tips for the Best Loaf
There are many variables when making homemade bread. Don’t be discouraged if a recipe doesn’t turn out exactly as you hope, this is a learning process. Extra humidity in your flour or your environment, and the temperature of the room, all have an impact on the final results. The key is learning what tweaks need to be made.
If the dough seems too dense, let it rest longer before kneading. The longer the rising process, the more flavor develops, so it’s ok if this whole thing takes longer. You can also stunt the rising of your dough by placing it in the fridge. This allows those flavors to develop and slows down time for you if you are not ready to tend to your dough.
If you are looking for some extra fluffiness and rise, try adding 1 egg! It can cause the tops to brown a little faster but it adds that extra rise and fluffiness you may be after.
Most Common Problems + Fixes:
1. Not enough gluten development
- Whole wheat needs thorough kneading.
- Knead 8–15 minutes by mixer. In my ankarsrum mixer I sometimes go 20 minutes because it’s so gentle on the dough, which mimics hand kneading and really helps with gluten development in freshly milled flour.
- Dough should feel elastic and slightly tacky.
👉 Fix: If it tears easily instead of stretching, keep kneading.
2. Too much flour
- Whole wheat absorbs flour slowly.
- If you add flour too quickly, the dough gets stiff and can’t rise well.
👉 Fix: Add flour gradually and stop when dough pulls from the bowl but still feels soft.
3. Yeast not active
- Water too hot kills yeast; too cool slows it way down.
- Ideal water temp: 100–110°F.
👉 Fix: If dough doesn’t noticeably rise in the first hour, move it somewhere warmer or start over with fresh yeast.
4. Large air bubbles
Sometimes large pockets of air for, this can be annoying when you cut into your loaf. B
👉 Fix: Be sure to press down the dough to remove excess air when you are shaping your loaves. It will rise again the pan and hopefully you will have a nice even crumb for sandwiches. Also be careful to not over proof your dough. (aka, don’t forget about it!)
When Bread Isn’t Rising Well
Check these first:
1. Cold kitchen or cold water
- Whole wheat rises slower than white bread.
👉 Fix: Let it rise in:
- the oven with the light on
- near (not on) the stove
- covered with a towel or plastic wrap
Expect 1½–2 hours for the first rise sometimes.
Fluffy Honey Wheat Sandwich Bread
Ingredients
Notes
- A Note on Yeast If you only have active dry yeast, you just need add the yeast at the beginning with the water, honey, and oil and make sure your water is warm to the touch. Your yeast wants a warm cozy temperature to BLOOM. Once that yeast looks foamy, add in your flours. You can also do this in a separate bowl with a little but of the water from the recipe and a big pinch of sugar. This is a really fast and reliable way to bloom your yeast. I store my yeast in the freezer to make sure it is always fresh.
- Add Extra Yeast You can add more yeast if needed, this speeds up the process. I like using 1 tbsp for this 2 loaf recipe because it means the bread doesn’t rise too fast and the flavors have more time to develop. But if you find you are waiting too long, you can always add another tsp of yeast and it will speed things along.
- Brush tops with melted butter after baking for a softer crust.
Method
- In the bowl of a stand mixer, combine the warm water, olive oil, honey, and yeast. Allow the yeast to bloom for a few minutes if using active dry yeast. Then add in the salt, apple cider vinegar, and yeast.
- Add in the flours and mix until just combined. Allow the dough to rest for 10-30 minutes.
- Knead the dough for 10-15 minutes on medium speed until it looks more smooth and elastic. Then turn off the mixer, cover the bowl, and allow the dough to rise for about 1-2 hours untul it has doubled in size.
- Punch down the dough, divide it in half, and shape into two sandwich loaves. I like to do this with wet hands and a very lightly wet countertop. Shape the dough into a rectangle, pushing out any visible air bubbles, and then fold and roll tightly into a nice loaf shape that fits the length of a 9×4 pan.
- Place them in greased loaf pans and let rise for another 45 minutes or until it's reached the top of the loaf pan.
- Bake at 375°F for 5 minutes then reduce the heat to 350 for 30 minutes or until golden brown and slightly hollow-sounding when tapped.
- Cool completely before slicing to keep the texture soft and fluffy.
Video
This post contains affiliate links, which means I may earn a small commission if you make a purchase through them—at no extra cost to you. I only share products I truly use and love.
We love this recipe so much. I’m ready to make it sourdough and make it the ULTIMATE. I need help though! 😍
I made this last night. Actually made into 16 hamburger buns because I havent found a FMF bun recipie I love and this bread recipie was on my list to try. Turned out SO good. I think our family of 6 (1 being a baby) ate 14/16 buns in less than 24 hrs 😆
Making again right now as bread loaves!
Our FAVORITE bread!!!!!