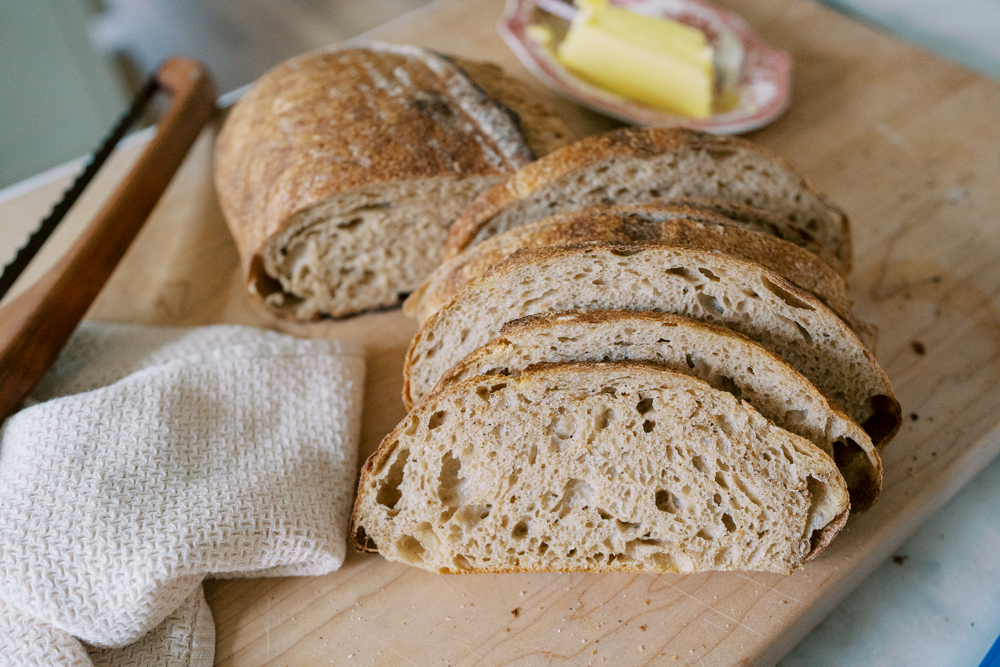
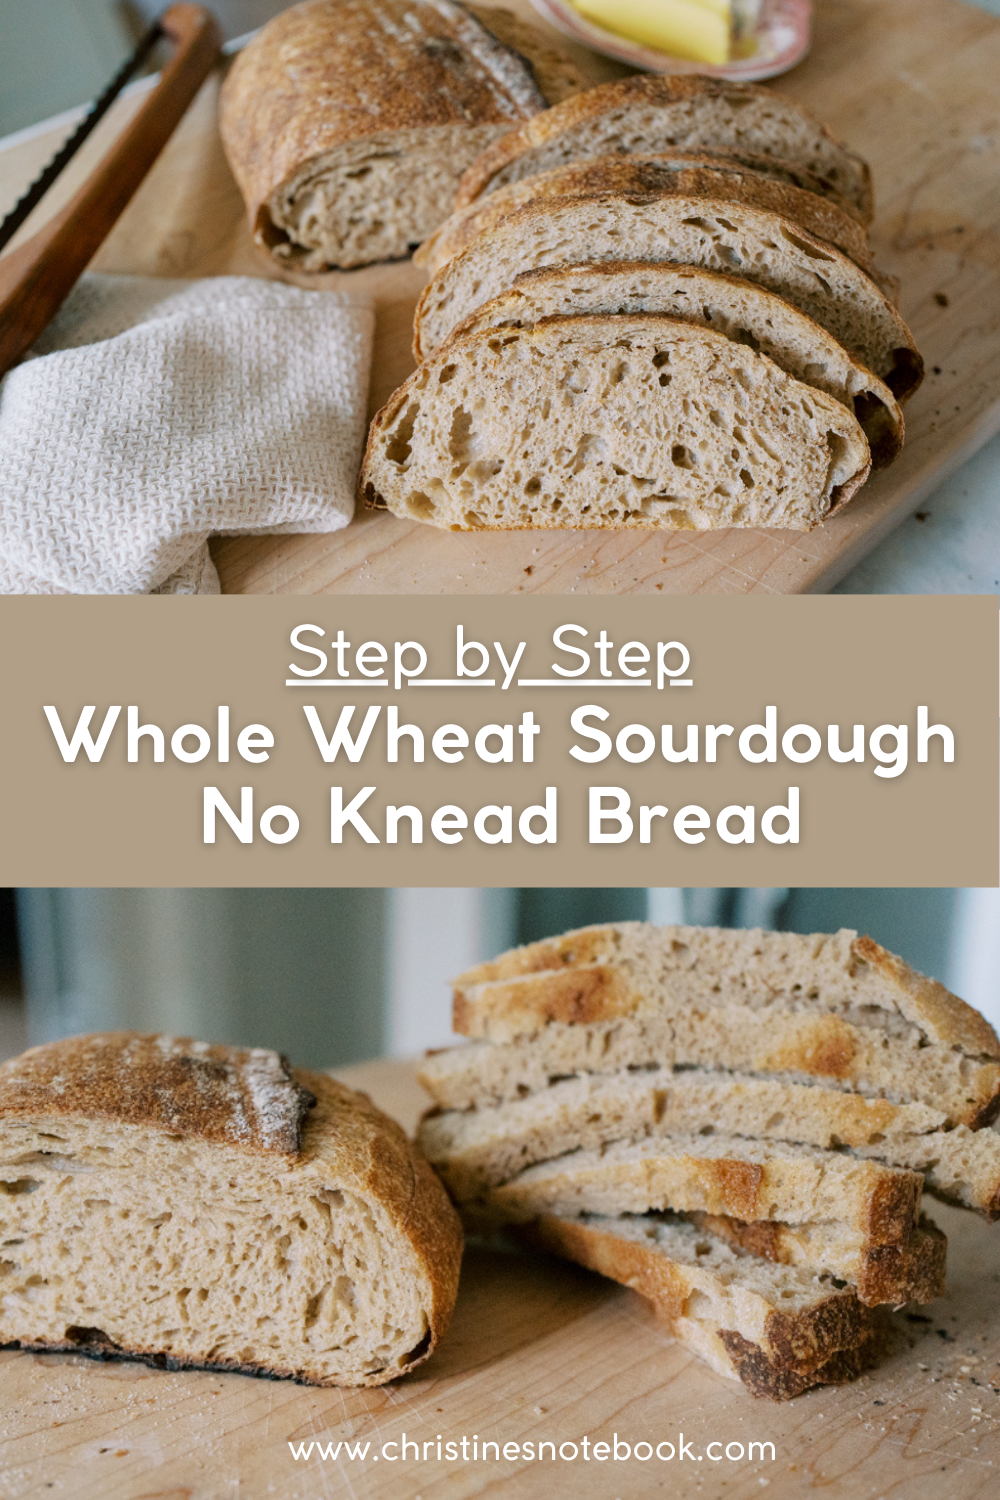
No-Knead Whole Wheat Sourdough Bread
This is the perfect sourdough bread, and in my opinion, the only method you truly need to learn when it comes to sourdough. In this post, I’m showing you how to make a classic artisan sourdough loaf with freshly milled whole grains. I’ve also included notes on how to make the original Tartine Bread version with all-purpose flour which is so flavorful and delicious that I can’t resist including it into my bread baking routine. If you love the deep, complex flavors of sourdough and want to include freshly milled whole grains into your diet, this Artisan No-Knead Whole Wheat Sourdough Bread is the perfect recipe for you. Made with a blend of whole wheat and all-purpose flours, this loaf offers rich nutrition, a chewy crumb, and a beautifully crispy crust. With minimal hands-on time, it’s a great choice for busy home bakers who want bakery-quality bread at home.
Why You’ll Love This Recipe
Crispy artisan crust – Baked in a Dutch oven for that perfect crunch.
No kneading required – The long fermentation develops the gluten naturally.
The right balance using 70% whole wheat and 30% white flour – Made with mostly whole wheat flour for added nutrition but still maintaining a nice soft flavor and crumb with the addition of white flour. The perfect balance in my opinion!
No mixer required – All you need is a large bowl and your hands!
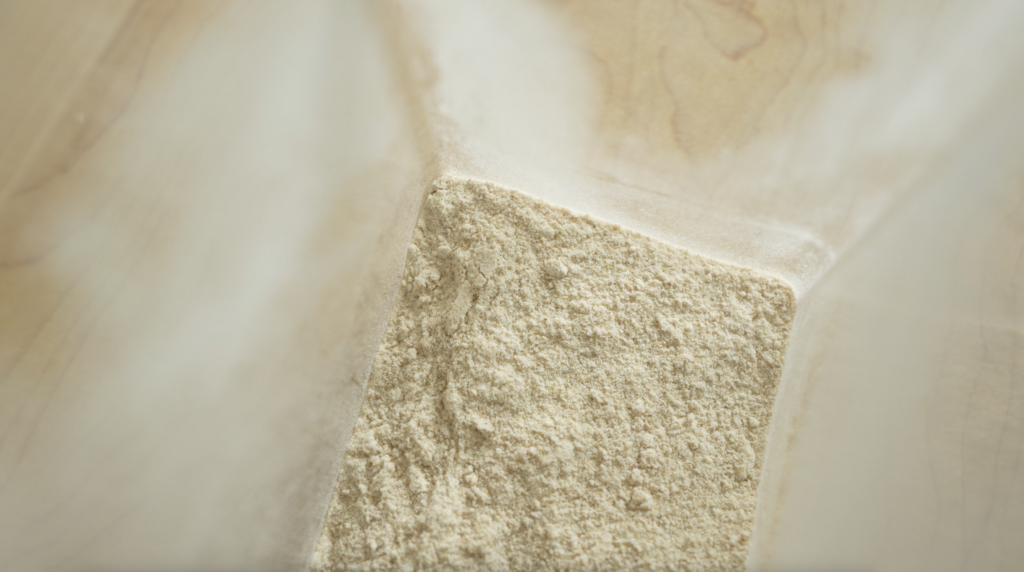
Using Freshly Milled Flour & Choosing the Right Wheat
Using freshly milled flour can elevate the flavor and nutritional value of your sourdough bread. (This is the grain mill I use) In this recipe, I use a blend of hard white wheat and hard red wheat. Both of these have higher protein content, making them ideal for bread baking. Soft white wheat, einkorn, and kamut have lower protein levels, which can make it challenging to achieve a good rise and structure. While I have experimented with Kamut in this recipe before—blending it with hard red and hard white wheat for added protein—I found that it gave the loaf a more pronounced sour flavor, which wasn’t my favorite.
Something to Keep in Mind: Whole Grains Ferment Faster
Whole grain flour also responds more quickly to sourdough fermentation, meaning that the dough can become sour faster than when using white flour. Because of this, I recommend keeping a close eye on fermentation times. You may need to refrigerate the dough sooner than you would with all-purpose flour to prevent it from over-fermenting.

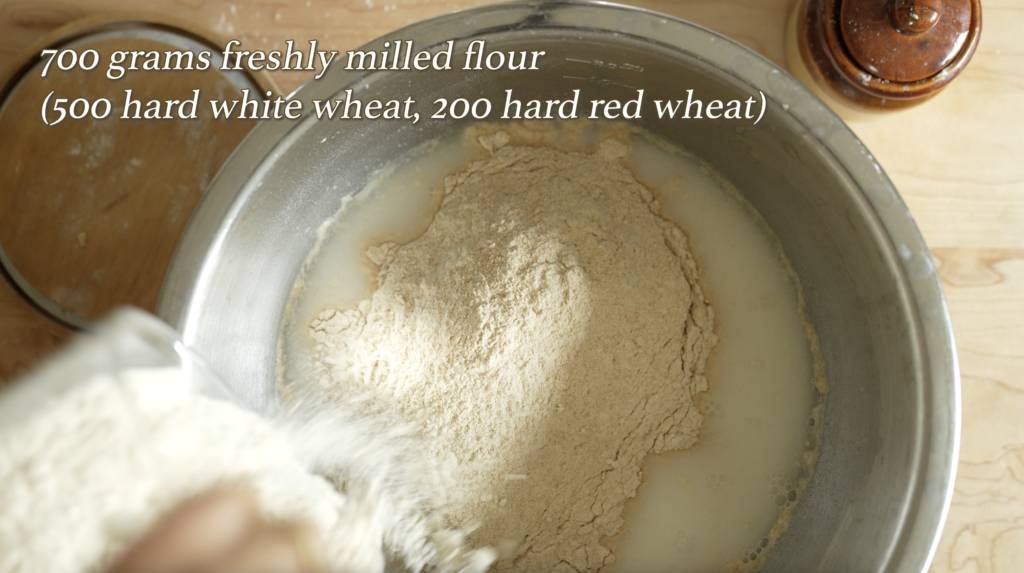
Whole Wheat Sourdough Bread Ingredients
- 730g water
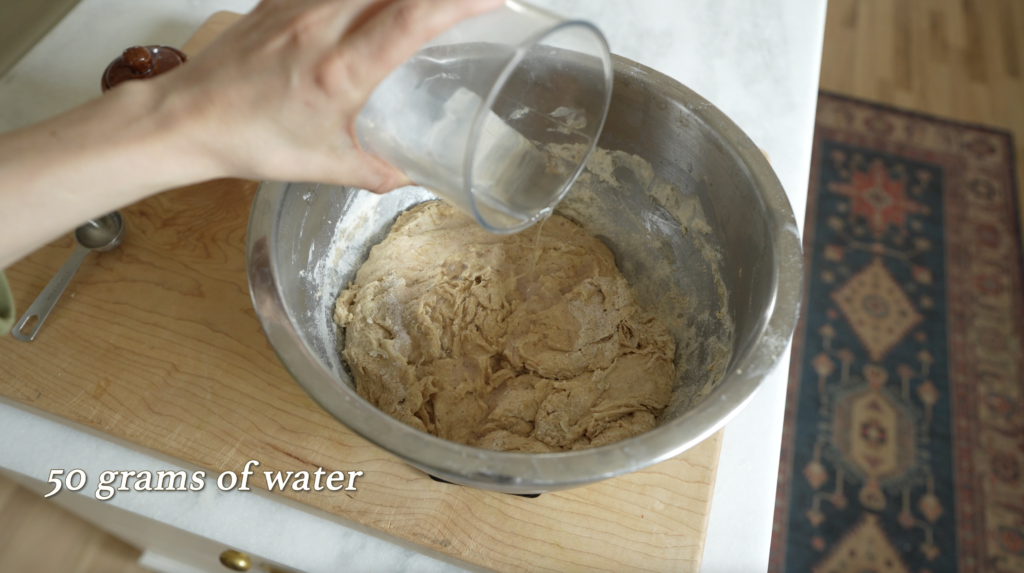
- 50g additional water (added later)
- 700g whole wheat flour (I did a blend of freshly milled hard red and hard white wheat, with the majority being hard white)
- 300g all-purpose or bread flour
- 200g sourdough starter
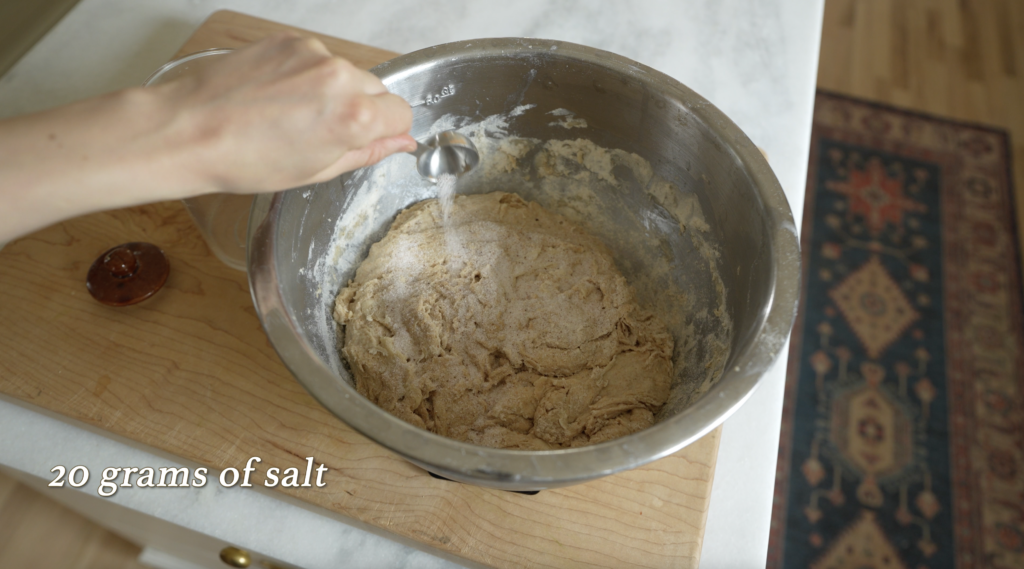
- 20g salt
Example Baking Schedule
Because whole wheat ferments faster than all-purpose white flour, I’ve found that this baking schedule works well for this recipe. While many sourdough recipes call for an overnight cold ferment in the fridge, experimenting with a shorter, colder ferment may be beneficial for this loaf.
Night Before – Feed your sourdough starter. I use 1 tablespoon of starter, 1 cup of all-purpose white flour, and a scant cup of water.
Early Morning – Mix together your dough and let it rest. Throughout the morning and early afternoon, perform your stretch-and-folds during the bulk fermentation.
Mid day – Shape your loaves and place them in the fridge for a 1-2 hour cold ferment to slow fermentation and enhance flavor. You want the dough to be cold for easy handling when you score the loaves and bake them.
Dinner Time – Bake your loaves and serve them fresh with dinner, or allow them to cool completely and store for later.
Variation: The Original Tartine Country Bread with All-Purpose Flour

If you would like to make the original version of this recipe without using as much whole wheat flour, you only need to make a few slight modifications to the ingredients. The amounts are as follows:
- 700g water
- 50g additional water (added later)
- 100g whole wheat flour (the small additional of whole wheat flour helps with flavor and fermentation)
- 900g all-purpose or bread flour
- 200g sourdough starter
- 20g salt
Follow all the same steps I list out here, except you can shorten the autolyse time by half. You only need a 20-30 minute autolyse for this recipe.

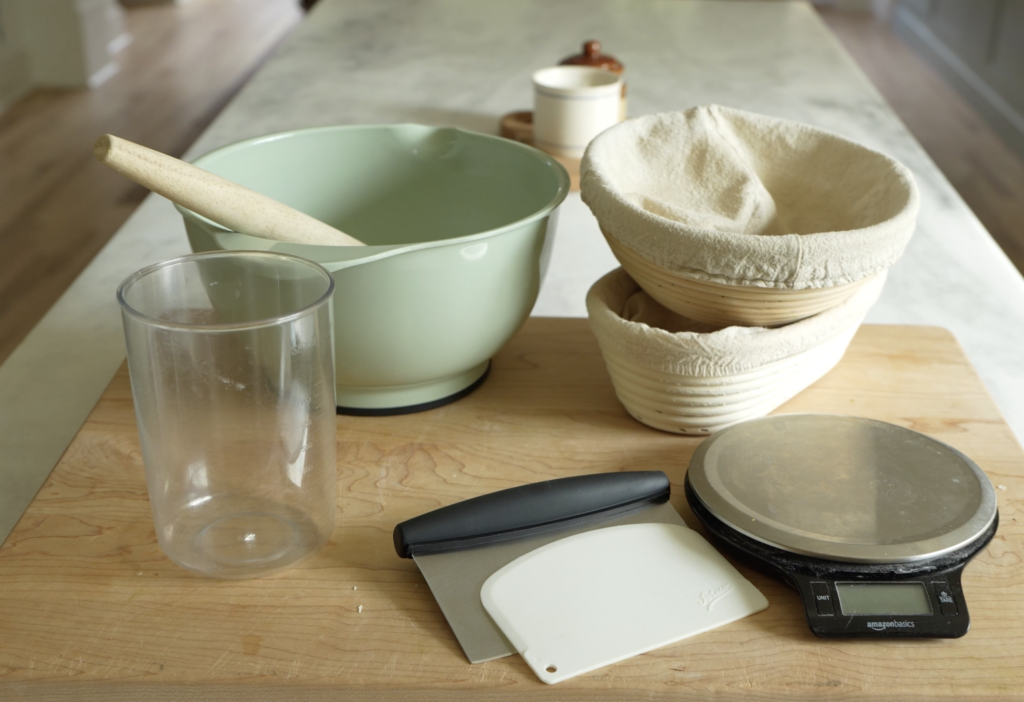
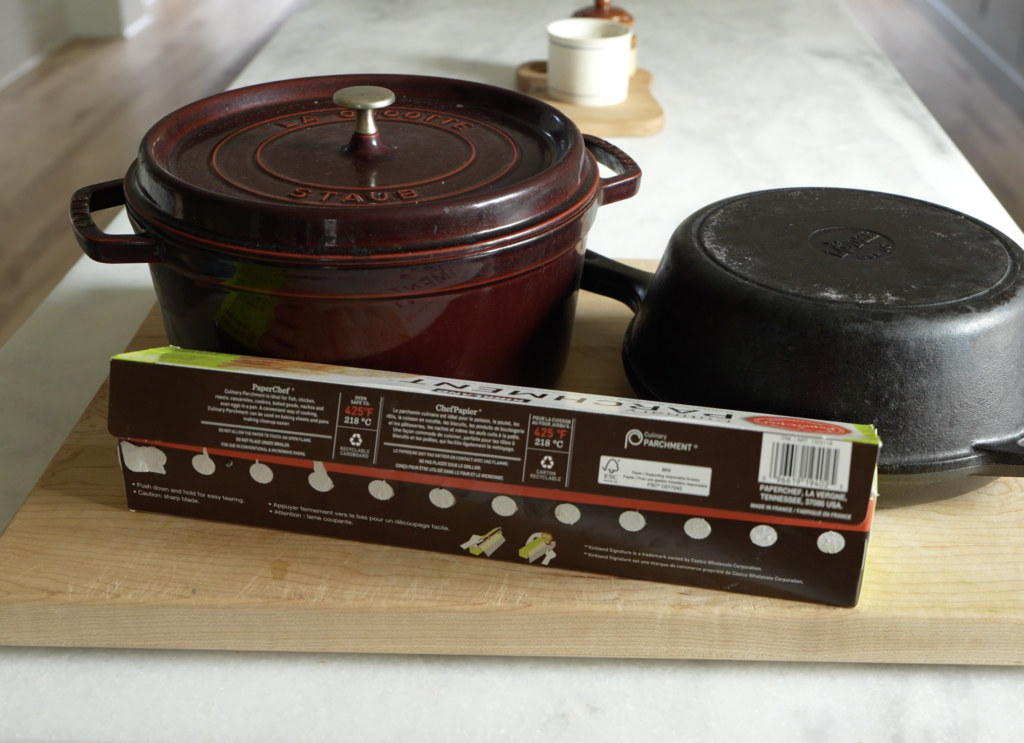
Supplies
- kitchen scale
- two proofing baskets
- large mixing bowl
- bench scraper
- bowl scraper
- danish dough hook (or something else for mixing)
- combo cooker or dutch oven for baking
- helpful: parchment paper and a bow knife
Step-by-Step Instructions
While you read through the following steps, this should give you a glimpse into how to make this bread. Refer to the full video for more detailed instructions if any part of this is confusing to you. Now, let’s get baking!
1. Prepare the Starter Mixture
If you need help with understanding how to feed your sourdough starter, I did a whole post on this topic to clear up any confusion! In a large bowl, measure 730g of water. Add 200g of sourdough starter and mix until the water looks milky.

2. Mix the Dough
Add the whole wheat and all-purpose flours to the water-starter mixture. Stir until fully combined. Cover and let rest for 30 minutes to an hour (this step, called autolyse, helps gluten development).

3. Add Salt & Hydrate
Sprinkle 20g of salt over the dough and pour in the additional 50g of water. Use your hands to mix until the salt is evenly distributed throughout the dough.
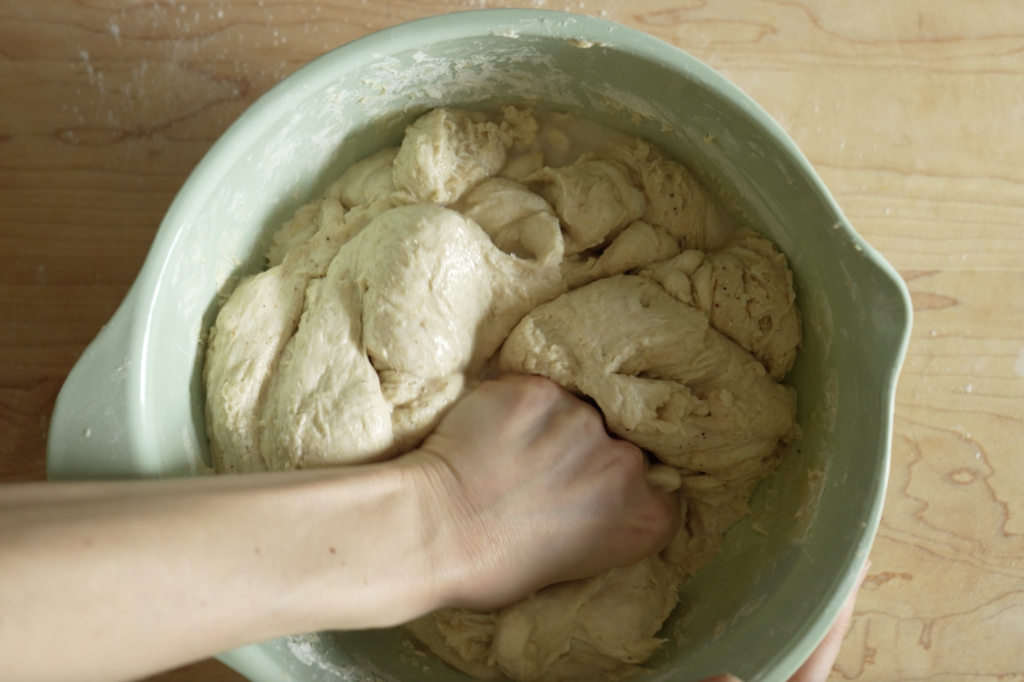
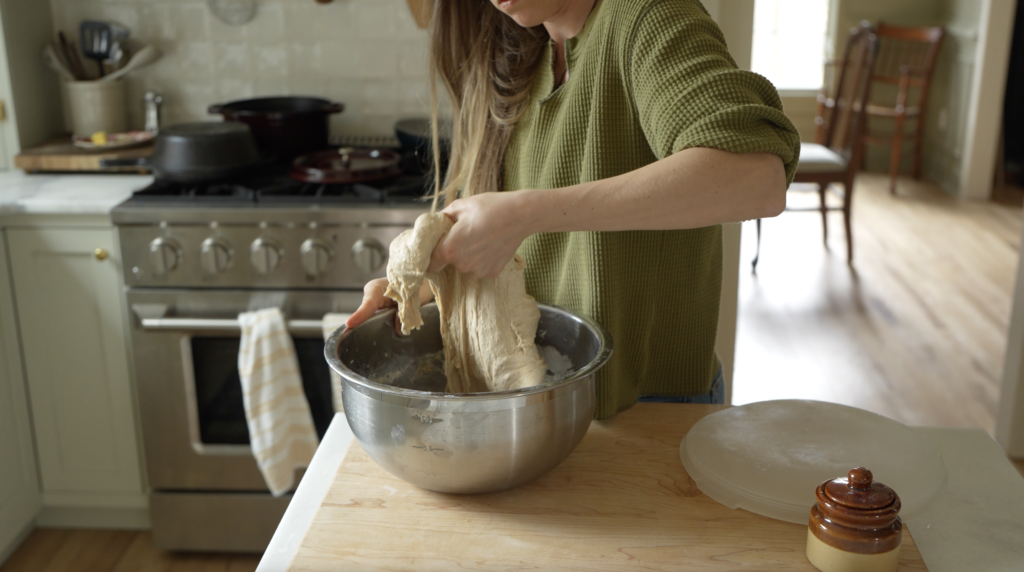
4. Bulk Fermentation & Stretch and Folds
Cover the dough and let it ferment for a bulk fermentation at room temperature for 4-6 hours. Perform a series of stretch and folds every 20-30 minutes for the first 2 hours, then once an hour for the remaining bulk fermentation time. The times here can vary depending on the temperature of your kitchen, so this bulk ferment may go faster in the summer. (You’ll know the dough has fermented enough where there a larger air bubbles and it looks more ‘poofy’.) This strengthens the dough and builds structure. Be careful here as you stretch and fold as you want to encourage gluten development and not tear the dough.
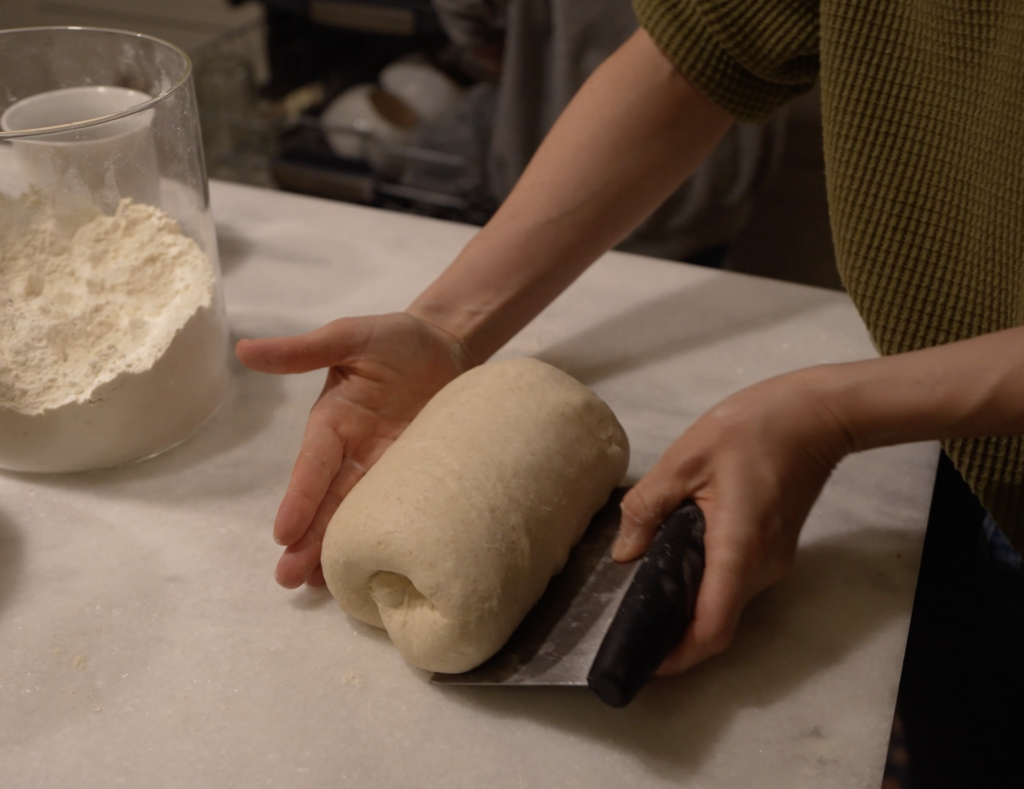
5. Shape and Cold Ferment
Once the dough has risen and developed structure, shape it into a round/oval boule. Place it in a well-floured proofing basket. Cover and refrigerate overnight or for a few hours for enhanced flavor and texture.
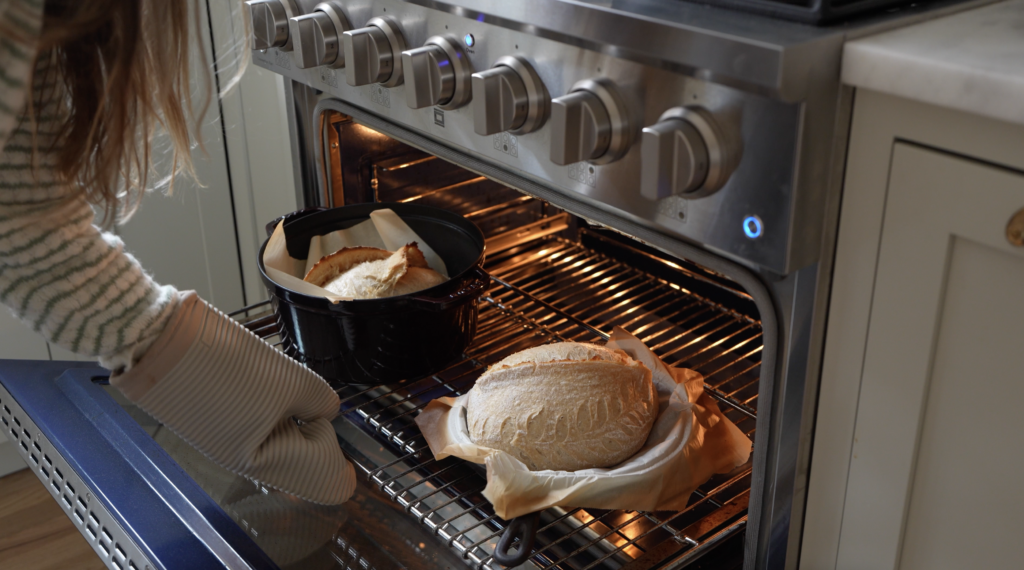
6. Bake Your Sourdough Boule
- Preheat your oven to 500°F (260°C) with a cast iron Dutch oven or combo cooker inside.
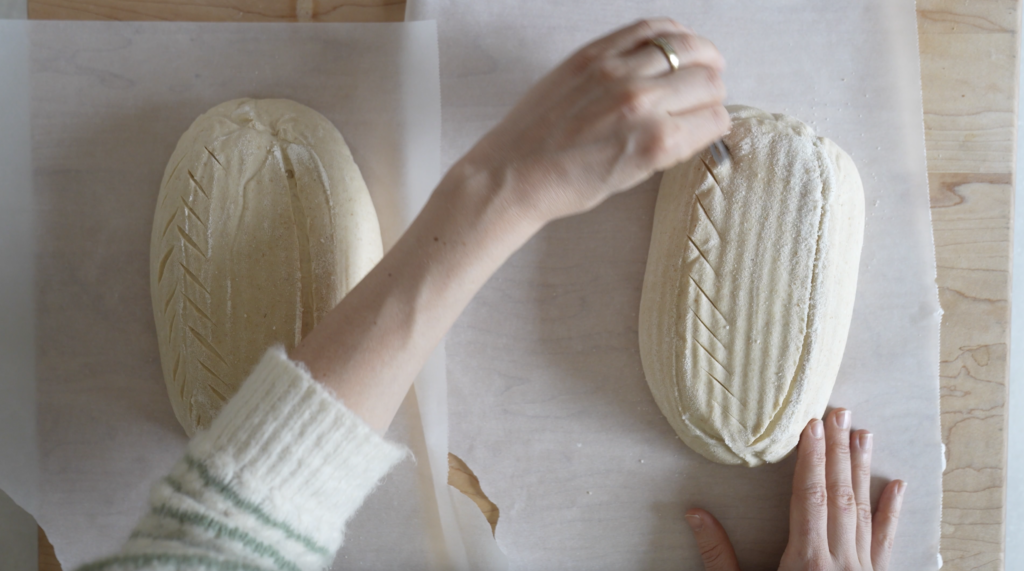
- Transfer the dough onto a piece of parchment paper, score the top with a sharp blade to allow for controlled expansion, and carefully place it into the preheated Dutch oven. Cover with lid.
- Place the Dutch oven back in the oven and lower the oven temperature to 450°F (232°C) It helps to place a baking sheet on the bottom rack under the Dutch oven to keep the bottom crust of the bread from burning. It really works!
- Bake covered for 30 minutes.
- Remove the lid and bake for another 10-15 minutes until the crust is deeply golden with slightly burnt bits on top.
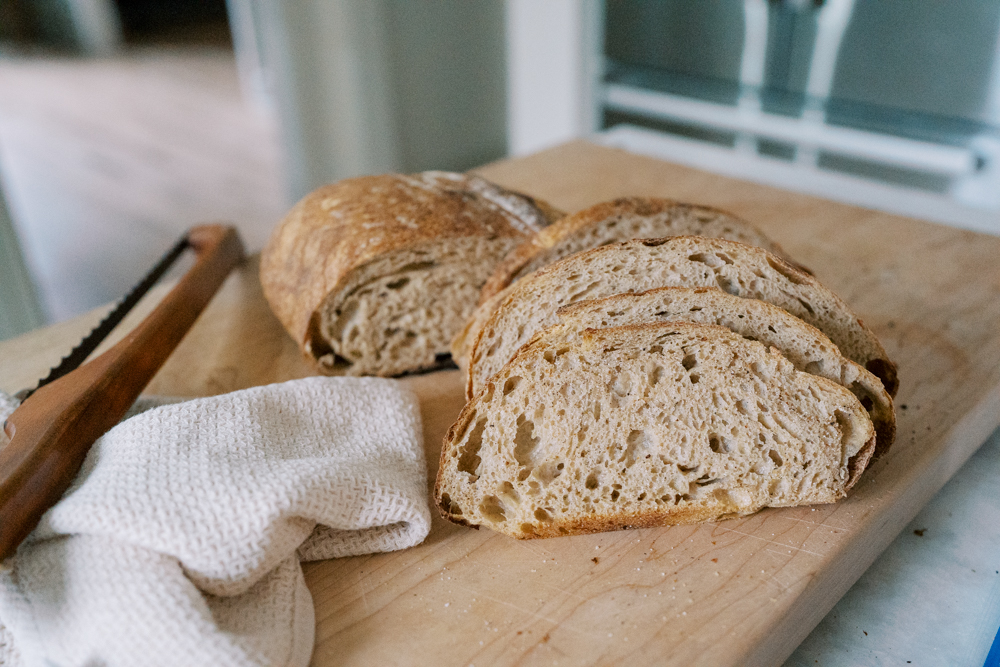
- Let cool completely on a wire rack before slicing.

Tips for Success
- Use a mature starter – A well-fed, bubbly starter ensures the best rise.
- Flour your proofing basket well – Prevents sticking and makes transferring easier.
- Use a sharp scoring blade – Helps control how the bread expands in the oven.
- Make sure your dough is cold before baking -Cold dough keeps its shape and makes it easier to score and transfer to the hot Dutch oven pan.
- Place a baking sheet on the bottom rack during baking to prevent burning on the bottom of the bread
Bread Storage
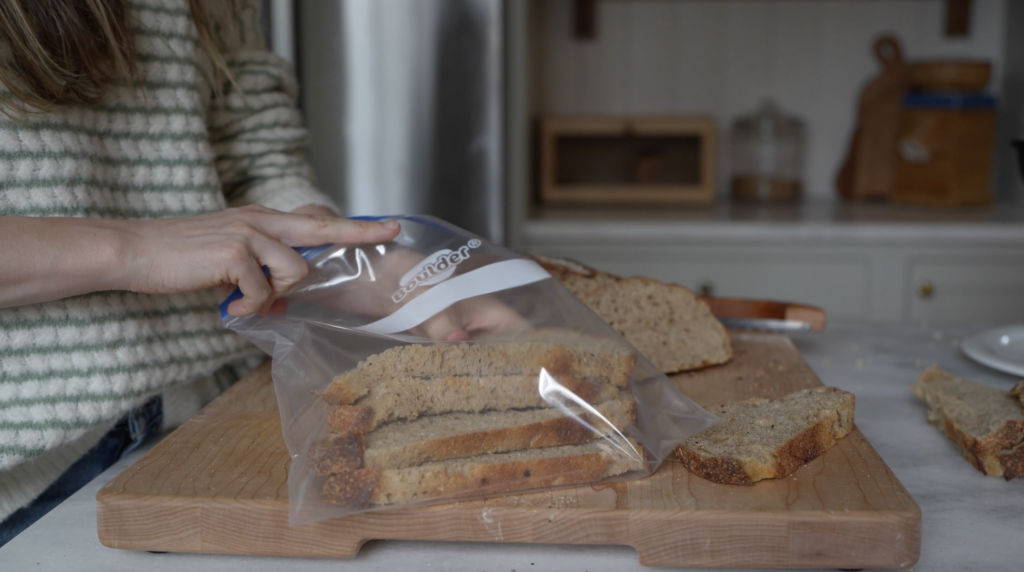
- Store your bread directly in the pot, a bread bag, or in a bread box. It lasts for 4-5 days. Toast it and it will be like new!
- For longer storage, place bread slices into a freezer safe bag, get as much air out as you can, and freeze! Toast it up and it will once again taste fresh and delicious.
Enjoy Your Homemade Artisan Sourdough!
This no-knead whole wheat sourdough boule is perfect for sandwiches, toast, or pairing with soups. The deep flavors and crisp crust make it well worth the wait. Give it a try and enjoy the magic of homemade sourdough!
Looking for sourdough sandwich bread? Try this sandwich bread!
Happy baking!
No Knead Whole Wheat Sourdough Bread
Ingredients
Equipment
Notes
Method
- Place your bowl on a kitchen scale and measure out 730 grams of water.
- Zero out the scale and add 200 grams of starter.
- Mix well until it looks milky.
- Add all the flours. Mix until a shaggy dough forms.
- Let it sit for 40-60 minutes.
- Sprinkle 20g of salt over the dough and pour in the additional 50g of water. Use your hands to mix until the salt is evenly distributed throughout the dough.
- Cover the dough and let it ferment at room temperature for 4-6 hours. Perform a series of stretch and folds every 30 minutes for the first 2 hours, then once an hour for the remaining time. This strengthens the dough and builds structure. Be careful here as you stretch and fold as you want to encourage gluten development and not tear the dough.
- Once the dough has risen and developed structure, shape it into a round/oval boule. Place it in a well-floured proofing basket. Cover and refrigerate overnight or for a few hours for enhanced flavor and texture.
- Preheat your oven to 500°F (260°C) with a cast iron Dutch oven or combo cooker inside.
- Transfer the dough onto a piece of parchment paper, score the top with a sharp blade to allow for controlled expansion, and carefully place it into the preheated Dutch oven. Cover with lid.
- Place the Dutch oven back in the oven and lower the oven temperature to 450°F (232°C) It helps to place a baking sheet on the bottom rack under the Dutch oven to keep the bottom crust of the bread from burning. It really works!
- Bake covered for 30 minutes.
- Remove the lid and bake for another 10-15 minutes until the crust is deeply golden with slightly burnt bits on top.
- Let cool completely on a wire rack before slicing.
Video
This post contains affiliate links, which means I make a small commission at no extra cost to you. As an amazon associate, I earn from qualifying purchases.
Christine, I noticed you have the same link for both the bench scraper and the dough scraper. Could you link the dough scraper you use? Thank you so much! Loving your videos!!
hey! Sorry about that! I fixed those links. The plastic spatula is actually called a bowl scraper and it’s very handy, here is the link to my specific one which I really like: https://rstyle.me/+qyad42jDaZSf-VPMZLAmMw
Hey! I was wanting to make this sourdough this weekend but I was confused about how many grams of bread flour would be best to substitute for the freshly milled whole wheat? I only have bread flour on hand, but if you think I should just use a different recipe let me know! Thanks!
Hey! Use 1000 grams of bread flour in total! You will love it!
Thanks so much! Also, I love your videos and have been so inspired as a new wife and homemaker 🙂 thanks for doing what you do and sharing it with us all! God bless!
Hi Christine! Do you think this recipe would work with 100% freshly milled flour? If so, would you change any of the flour measurements?
Hey! It would work but it wouldn’t hold it’s shape as well, I would take the dough and bake it in a loaf pan at 400 for about 35 minutes-40 minutes. Tent it with foil for the first 30 minutes. You may need slightly more water (20 grams?) and it will ferment faster!
Thank you, I’ll try your suggestions. I made this yesterday and it’s the best bread I’ve ever made! Thank you for sharing this recipe and so many others! I thoroughly enjoy all of them. ❤️