Vanilla Bean Ice Cream – Naturally Sweetened
Rich, creamy vanilla bean ice cream made in the ice cream maker and sweetened naturally with maple and honey. Smooth, simple, and full of real vanilla flavor.
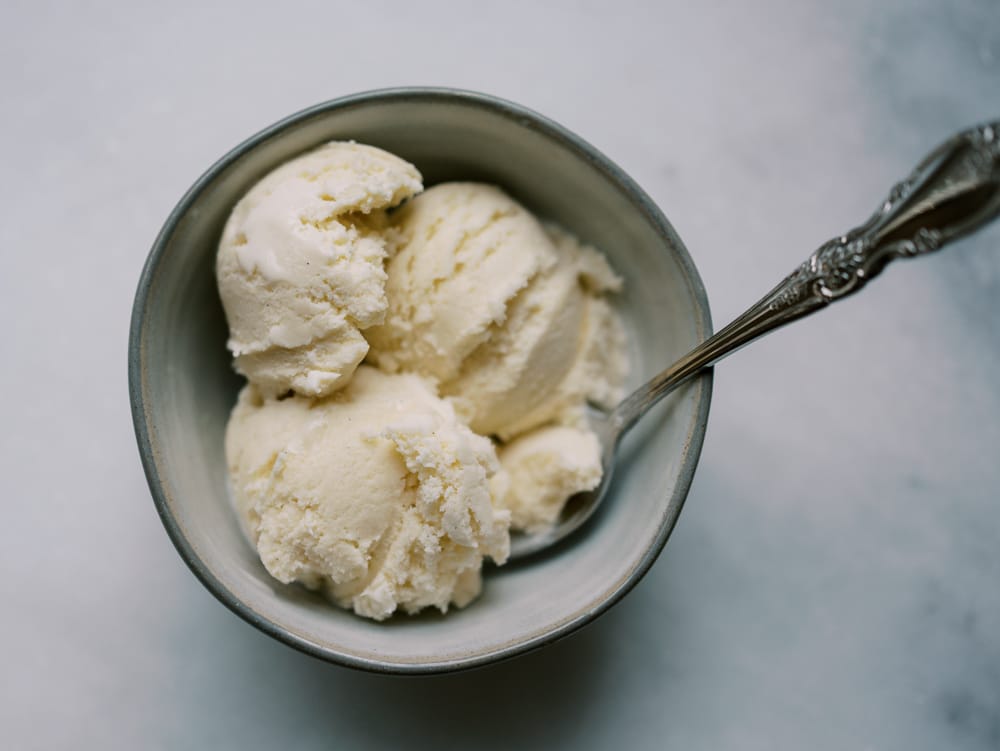
There is something so satisfying about homemade ice cream, especially when it is made in an ice cream maker. It gives you that smooth, creamy texture you just cannot get any other way. This recipe is naturally sweetened with maple syrup and honey, and it gets its deep vanilla flavor from a real vanilla bean. It tastes like the kind of classic vanilla ice cream you would find at a small creamery, only fresher and healthier.
How I Make It
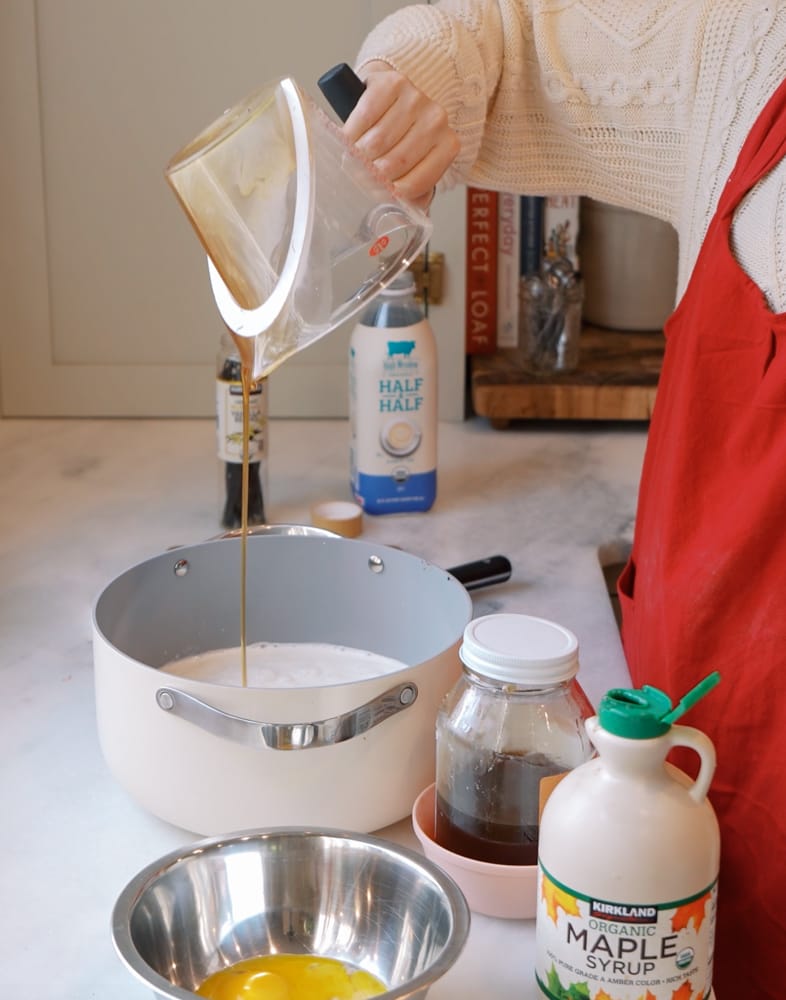
In a large saucepan, add the milk, cream, milk powder, maple syrup, honey, salt, vanilla bean seeds, and the scraped pod. Whisk until everything is well combined.
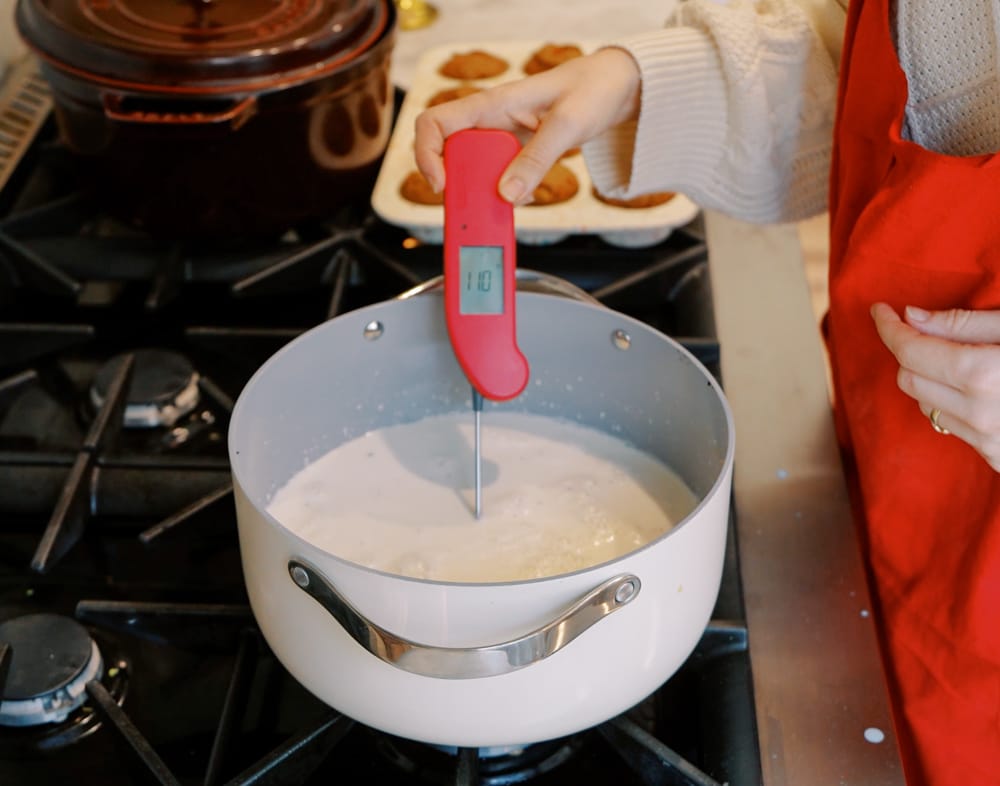
Place the pan over medium high heat and warm the mixture until it reaches 175F. Whisk and stir occasionally to keep it moving so it doesn’t scorch at the bottom of the pan. Then turn off the heat.
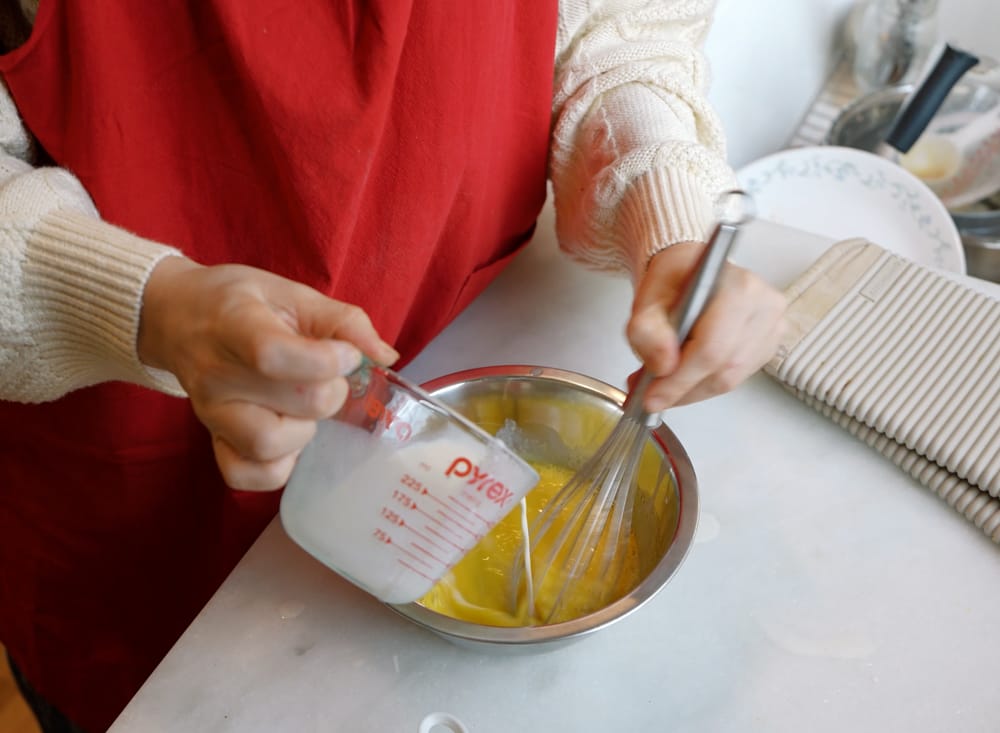
Temper The Egg Yolks
In a separate large bowl, whisk the egg yolks. Slowly whisk in about one cup of the warm milk mixture, repeating two more times until the yolks are warmed gently without cooking.
Return the saucepan to medium low heat. Slowly pour the tempered yolks back into the warm milk mixture while whisking constantly.
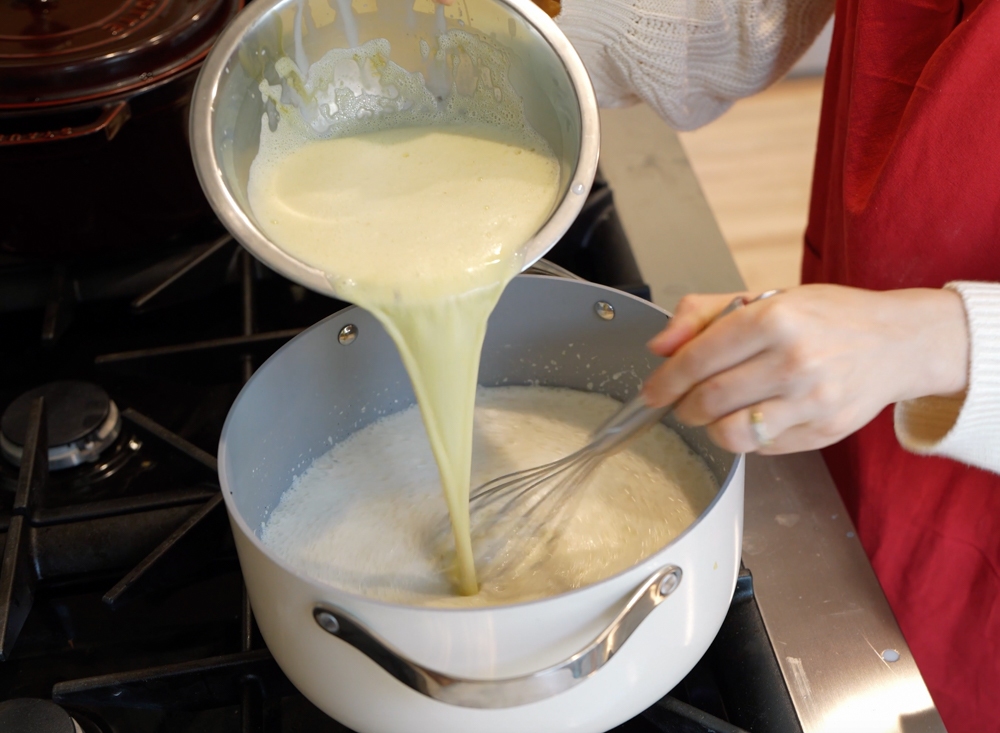
Cook the mixture while stirring until it thickens and reaches 180F. This usually takes 10-15 minutes.
Pour the custard through a fine mesh sieve into a heat safe bowl to remove the vanilla pod and any small cooked bits.
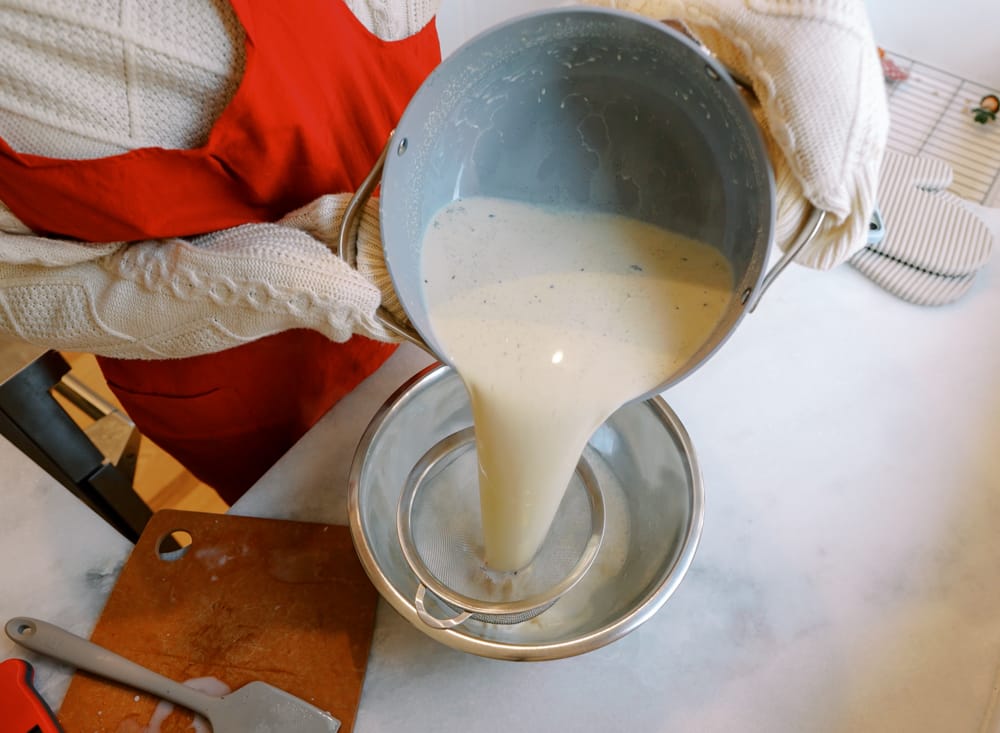
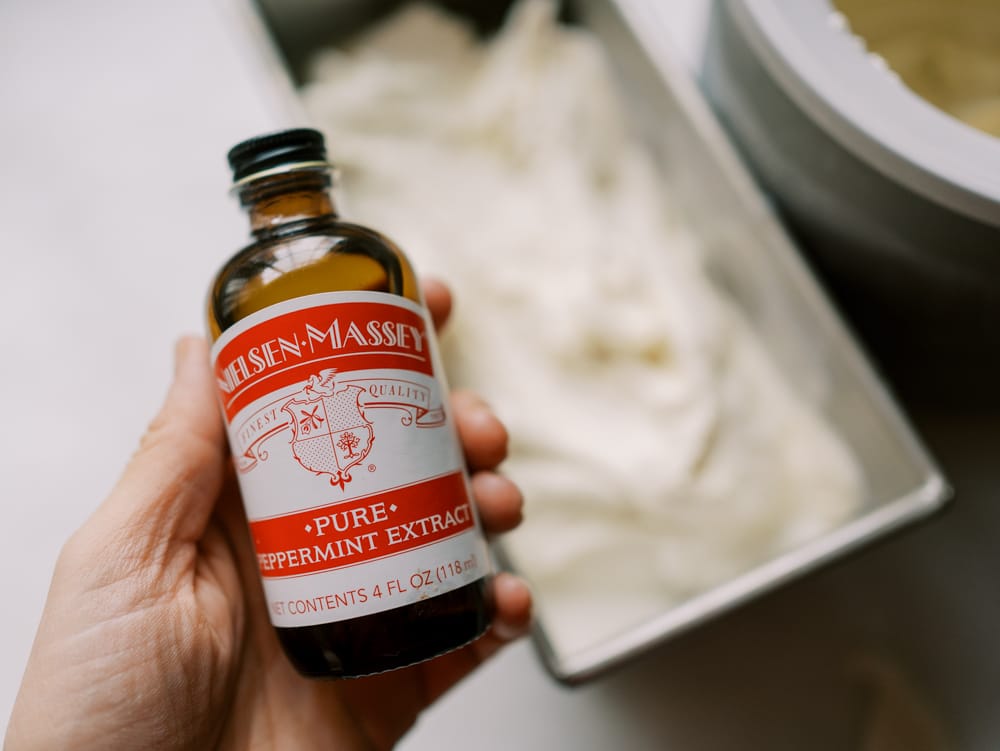
Cover the bowl with plastic wrap and refrigerate until fully cold, about two to four hours or overnight. Stir in almond extract or peppermint extract once the custard has chilled if using.
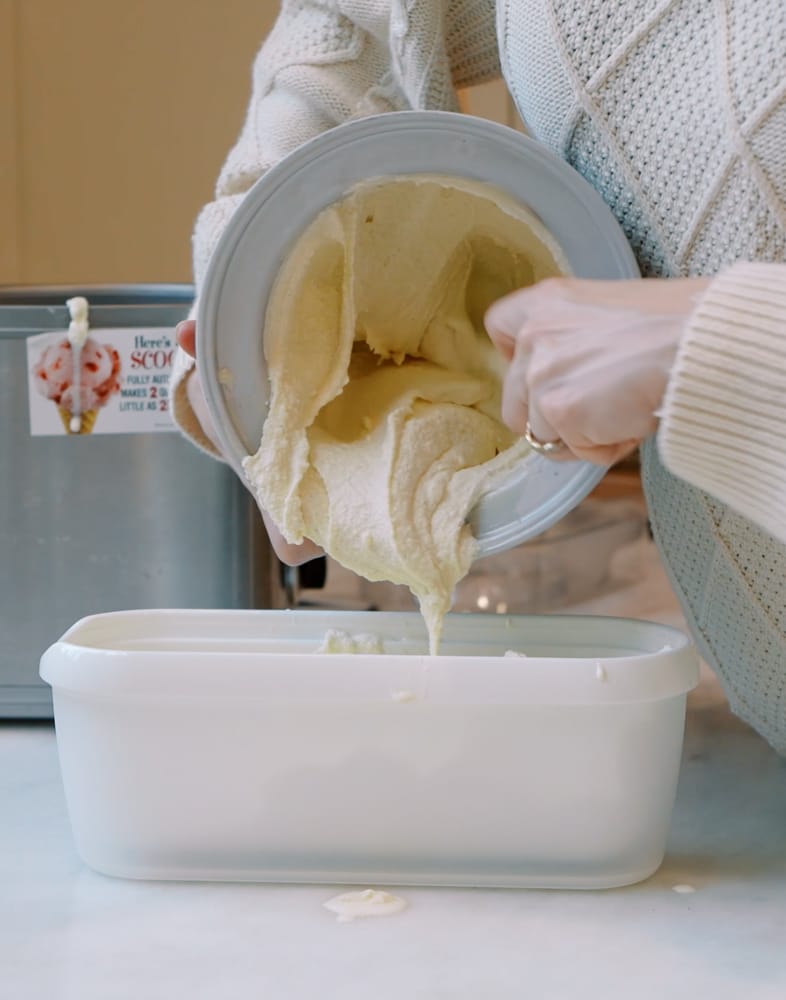
Pour the chilled custard into your ice cream maker. I use this ice cream maker and my ice cream turns out perfect everytime! Churn the mixture according to your machine instructions. Fold in any mix ins during the final minute of churning.

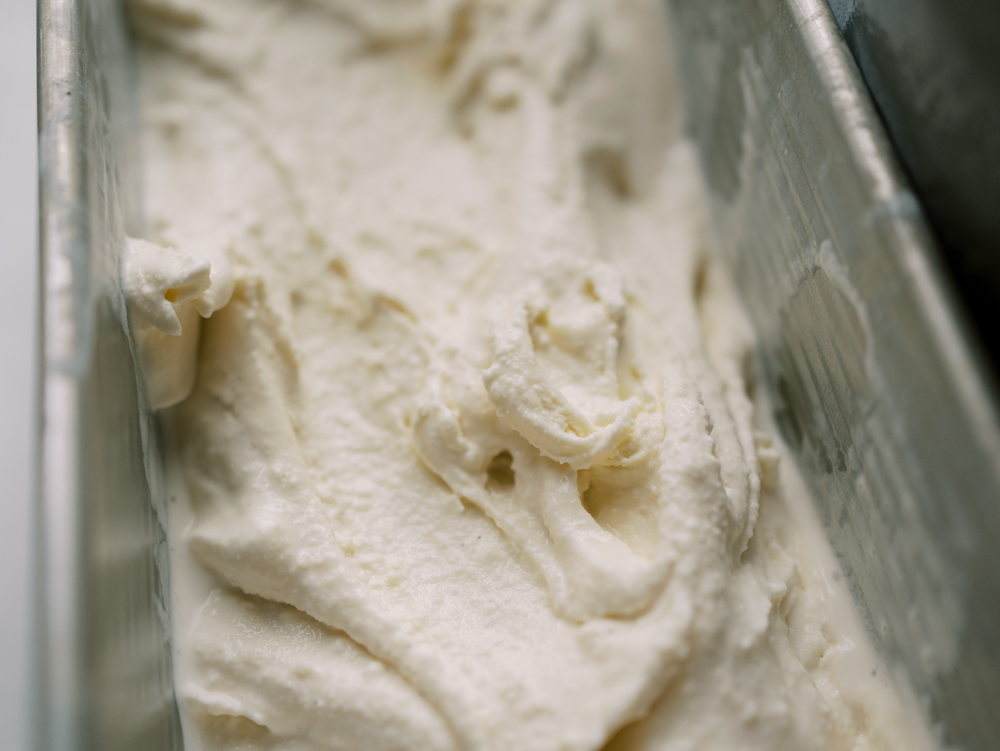
Transfer the churned ice cream into a freezer safe container and freeze until firm and scoopable.
Texture & Scoopability
- Texture: Thick and creamy due to egg yolks + milk powder + high cream content
- Scoopability: Good, may need a few minutes at room temp straight from freezer for perfect soft scoop.
Tips & Flavor Variations
• 1/4 tsp almond extract gives the ice cream a sweet, cake like flavor
• Add in 1/2 tsp peppermint extract to make it perfect for Christmas desserts.
• Fold in cookie pieces, chocolate chunks, or crushed peppermint for a fun mix in
👇🏻 View the full walkthrough of the recipe below on my YouTube channel
Naturally Sweetened Vanilla Bean Ice Cream
Ingredients
Equipment
Method
- In a large saucepan, add the milk, cream, milk powder, maple syrup, honey, salt, vanilla bean seeds, and the scraped pod. Whisk until everything is well combined.
- Place the pan over medium high heat and warm the mixture until it reaches 175 F. Stir occasionally with a rubber spatula so it doesn't burn. This takes about 10 minutes. Then turn off the heat.
- In a separate large bowl, whisk the egg yolks. Slowly whisk in about one cup of the warm milk mixture, repeating two more times until the yolks are warmed gently without cooking.
- Return the saucepan to medium low heat. Slowly pour the tempered yolks back into the warm milk mixture while whisking constantly.
- Cook the mixture while stirring continuously until it thickens and reaches one 180 F. This usually takes about 10 minutes. Don't walk away from this!
- Pour the custard through a fine mesh sieve into a heat safe bowl to remove the vanilla pod and any small cooked bits.
- Cover bowl with plastic and refrigerate until fully cold, about four hours or overnight. Stir in almond extract or peppermint extract or vanilla extract once the custard has chilled if using.
- Pour the chilled custard into your ice cream maker and churn according to your machine instructions. Fold in any mix ins during the final minute of churning.
- Transfer the churned ice cream into a freezer safe container and freeze until firm and scoopable.
Video
This post contains affiliate links, which means I may earn a small commission if you make a purchase through them—at no extra cost to you. I only share products I truly use and love.
Would whole milk powder work in this? That’s all I have.
This recipe was truly amazing! My husband said I do not need to try any other homemade ice cream recipes because this one is the BEST! I love that it’s naturally sweetened. My kids loved this ice cream, and I’m happy that I’m not feeding them sugar!
One tiny helpful thought…did you mean to use 1/2 *cup* of non fat milk powder? That’s what I used and hoped that you meant, but I didn’t see a measurement. 1/2 cup non fat milk powder worked for me. 🙂
I love hearing that!! Thank you! Yes I did mean 1/2 cup and THANK YOU for bringing that to my attention. Fixed!