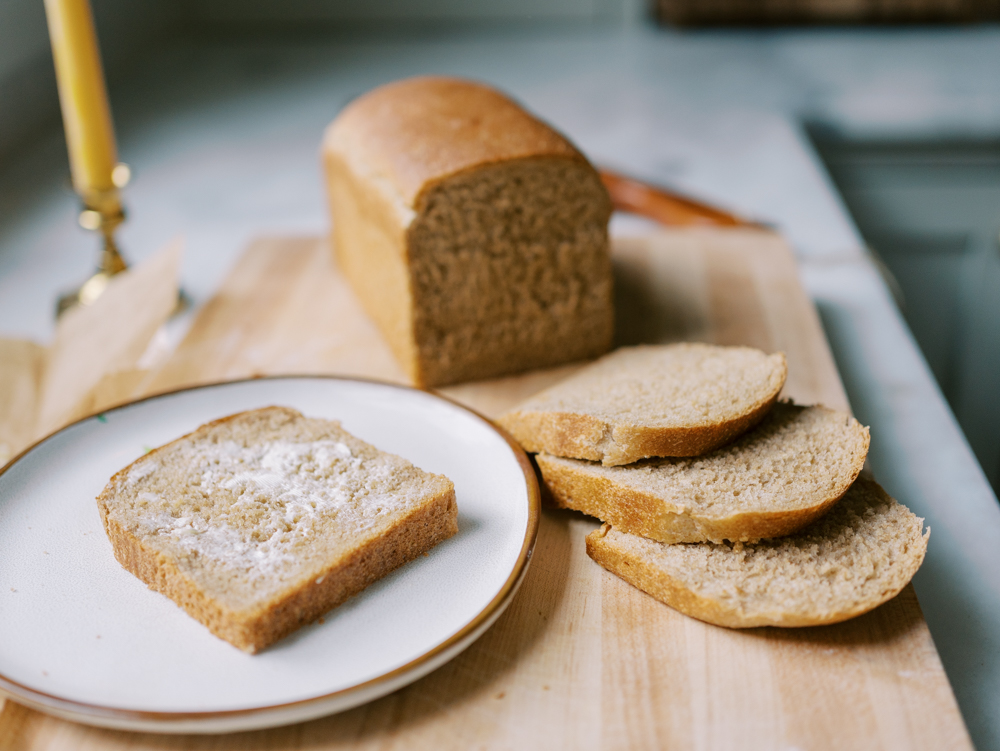
Sourdough Honey Wheat Sandwich Bread
If you’ve been looking for a soft sourdough sandwich bread made with freshly milled flour, this guide will show you exactly how to make it. You’ll learn the techniques, tips, and troubleshooting steps that help create a reliable loaf every time.
The Sandwich Bread I’ve Been Trying to Perfect
I’ve been working on this recipe for a long time. While my family already has a few favorite sandwich bread recipes, I wanted to create a loaf made with freshly milled whole grains that still offered the flavor and fermentation benefits of sourdough. Just as importantly, it needed to stay soft enough for everyday sandwiches and toast.
That’s actually harder than it sounds.
Traditional sourdough sandwich bread can sometimes be dense. On the other hand, many whole wheat sandwich breads rely heavily on commercial yeast and don’t have much flavor development. After a lot of testing, I finally landed on this recipe.
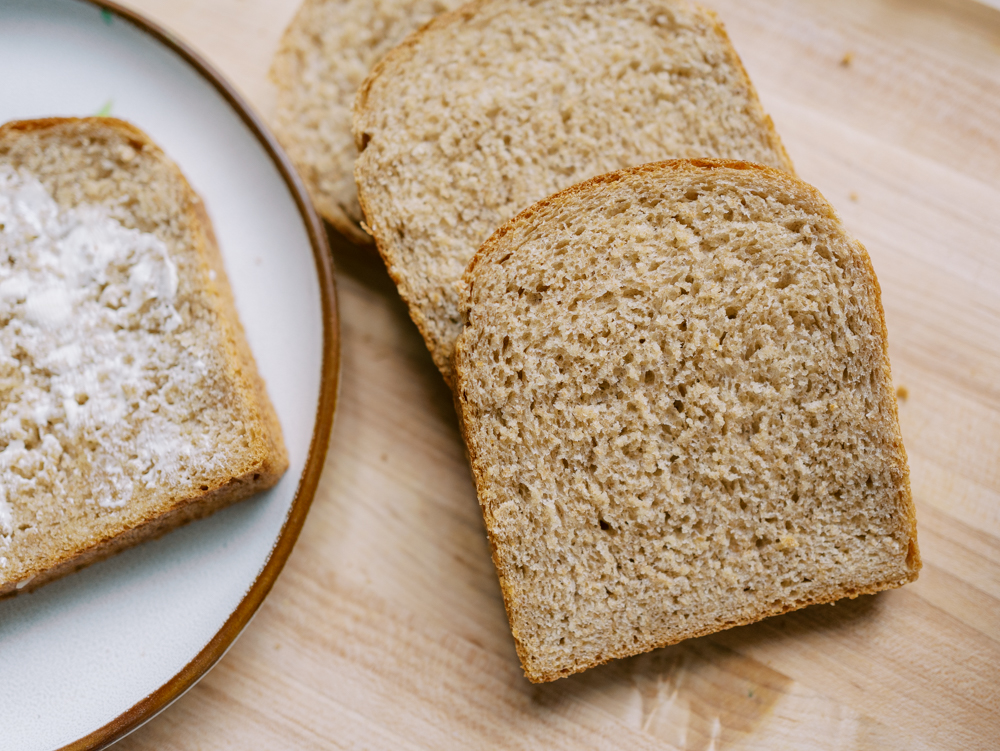
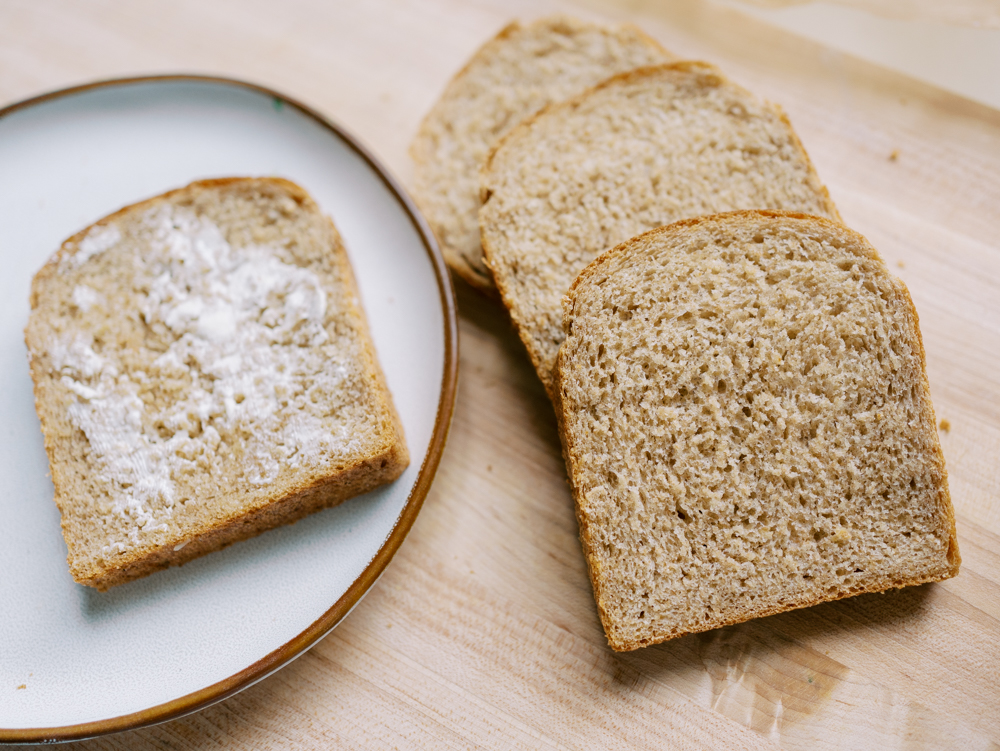
It uses an active sourdough starter as the primary leavening, with just a small amount of yeast added for consistency and a fluffy rise. The result is a soft sandwich loaf with great flavor, beautiful texture, and enough whole grains that I feel good serving it to my family. It has quickly become one of my favorite bread recipes!
Why You’ll Love This Bread
- Makes two large loaves
- Perfect for sandwiches and toast
- Uses freshly milled hard red wheat and khorasan
- Softer than traditional artisan sourdough
- Naturally fermented with sourdough starter
- Freezes beautifully
- Stays soft for several days
What Makes This Bread Different?
This isn’t a traditional artisan sourdough loaf. The goal here isn’t a giant open crumb or an extra tangy flavor. The goal is a soft, family friendly sandwich bread. The sourdough starter provides flavor and fermentation, the olive oil keeps the crumb soft, the honey adds a touch of sweetness, and the small amount of yeast helps ensure a predictable rise.
I like to think of the yeast as a supporting character. The sourdough starter is still the star of the show.
Ingredients
Makes 2 Loaves
- 520 grams water, room temperature
- 140 grams active bubbly sourdough starter
- 600 grams hard red wheat flour
- 200 grams khorasan flour
- 110 grams honey
- 100 grams olive oil
- 18 grams sea salt
- 1 teaspoon yeast
A Few Things To Know Before You Start
- Use An Active Starter
- This recipe works best when your starter is bubbly and active.
- I like to feed my starter the night before baking. By morning it is usually doubled, full of bubbles, and ready to use.
- If your starter is weak or sluggish, your rise times may be much longer.
- Let Freshly Milled Flour Cool
- If you’re milling your flour fresh, don’t immediately dump hot flour into your dough.
- Freshly milled flour can hold quite a bit of heat right after milling. Warm flour is fine. Hot flour is not.
- I like to give it a few minutes to cool while I mix the wet ingredients.
- Don’t Skip The Rest
- After mixing the flour into the wet ingredients, let the dough rest for at least 10 minutes. Thirty minutes is even better.
- Freshly milled flour needs time to fully absorb the liquid. This simple step makes the dough easier to work with and improves the final texture.
Step 1: Mix The Dough
- Add the water, sourdough starter, olive oil, honey, and sea salt to the bowl of a stand mixer.
- Mix until combined.
- With the mixer running on low speed, gradually add the hard red wheat flour and khorasan flour.
- Mix just until no dry flour remains.
- Cover the bowl and let the dough rest for 10 to 30 minutes.
Step 2: Add The Yeast And Knead
- Add the yeast.
- Knead on medium speed for 10 to 12 minutes.
- The dough should become smooth, elastic, and slightly glossy.
- Don’t expect a stiff dough.
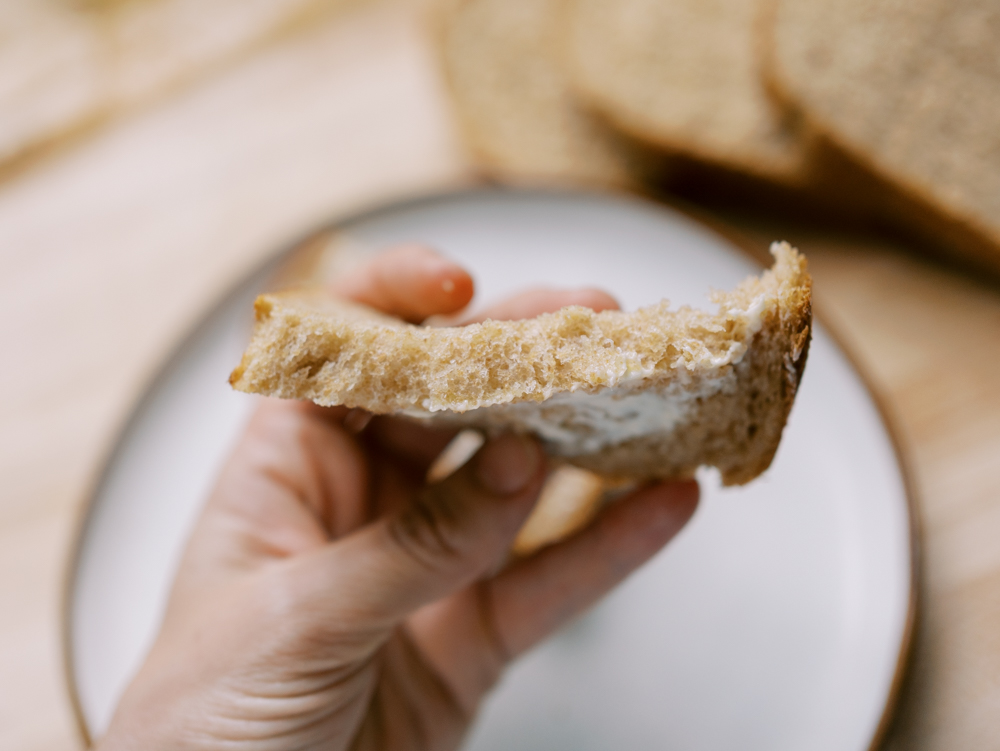
- Because of the honey and hydration level, this dough stays somewhat sticky. That’s completely normal.
- In fact, a slightly sticky dough often produces a softer loaf.
Step 3: Bulk Fermentation
- Transfer the dough to a lightly oiled bowl.
- Cover tightly with plastic wrap or a damp towel.
- Allow the dough to rise for approximately 3 hours, or until doubled in size.
- The exact timing will depend on the temperature of your kitchen.
- A warmer kitchen will speed things up.
- A cooler kitchen will slow things down.
- If your dough consistently rises too quickly, reduce the yeast to ½ teaspoon next time.
- Remember, we still want the sourdough starter doing most of the work.
Step 4: Prepare Your Loaf Pans
- Lightly grease two loaf pans with olive oil spray or line them with parchment paper.
- I prefer 9 x 4 loaf pans because they encourage a taller sandwich loaf.
Step 5: Divide The Dough
- Lightly dampen your countertop, bench scraper, and hands.
- This is one of my favorite tricks when working with sticky dough.
- Using water instead of extra flour prevents the dough from becoming dense while making it much easier to handle.
- Divide the dough into two equal portions.
Step 6: Shape The Loaves
- Gently press one portion into a rectangle approximately 10 x 7 inches.
- Fold the bottom edge toward the center.
- Fold the right side inward.
- Fold the left side inward.
- Next, take the top right corner and fold it diagonally toward the center.
- Repeat with the top left corner.
- These folds help create surface tension, which leads to a taller loaf.
- Starting at the top, tightly roll the dough toward yourself.
- Once rolled, cup your hands around the loaf and gently pull it toward yourself to create even more tension.
- Place the loaf into your prepared pan.
- Repeat with the second loaf.
Step 7: Final Proof
- Cover the pans with a towel.
- Allow the loaves to rise for approximately 60 minutes.
- The dough should look puffy and begin to dome above the top edge of the pan.
- Try not to focus too much on the clock.
- Watch the dough instead.
Step 8: Bake
- Bake at 375 degrees for 35 minutes.
- The tops should be golden brown and the loaves should feel light and airy.
- Remove from the pans and transfer to a cooling rack.
- Allow the bread to cool completely before slicing.
- I know it’s hard.
- But waiting gives you cleaner slices and a better crumb.
My Best Tips For Success
- Wet Hands Are Better Than Floured Hands
- Extra flour during shaping can create a heavier loaf.
- Lightly damp hands make sticky dough much easier to manage.
- Create Tension During Shaping
- This is one of the biggest secrets to beautiful sandwich bread.
- A tight loaf rises higher and bakes more evenly.
- Use Parchment If You’re Unsure
- I tested one loaf in a cast iron pan and learned the hard way that bread can stick.
- If you’re trying a new pan, parchment paper is cheap insurance 🙂
- Slice The Whole Loaf At Once
- Once the bread is cool, I like to slice the entire loaf and store it in a bread bag.
- It makes sandwiches, toast, and school lunches much easier throughout the week.
Frequently Asked Questions
- Why Add Yeast To Sourdough Bread?
- The yeast provides consistency and a reliable rise. Because the amount is so small, the dough still has time to ferment and develop sourdough flavor throughout the day. You get the best of both worlds. This also prevent an overly sour loaf, which we don’t love for this. It’s the perfect balance.
- Can I Leave Out The Yeast?
- Yes, however, expect significantly longer rise times and more variation from batch to batch. I would encourage starting this loaf later in the day, allowing a bulk ferment on the counter for a few hours, shape the loaf, then an overnight ferment in the fridge and bake in the morning, but your loaf will likely be more sour.
- Why Is My Dough So Sticky?
- This dough contains honey, olive oil, and freshly milled flour. It is naturally softer and stickier than many bread doughs. Wet your hands when working with the dough to keep it from sticking to your hands.
- How Do I Know When It’s Ready To Bake?
- The dough should be doming above the edge of the pan and feel airy when gently touched. If it still looks dense or tight, give it more time.
- Can I Freeze This Bread?
- Absolutely. Slice it first, then freeze in a bread bag or airtight container. Pull out individual slices as needed.
- How do I store this Bread?
- I like to slice my bread and keep it in leftover plastic bread bags. Beeswax bread bags are also a great option.
- Can I Use Store Bought Whole Wheat Flour?
- In theory the recipe should still work, but I would hold off on adding all of the water ( maybe hold back 50 grams) and see how the dough looks as it’s mixing, then slowly add in more water until your dough is smooth and elastic (but still a little sticky). Store bought wheat flour doesn’t taste as good and also behaves differently then fresh milled flour, but with some tinkering you should still be able to produce a beautiful loaf.
Final Thoughts
After many test batches, this is the sandwich bread recipe I keep coming back to.
It has the flavor of sourdough, the nutrition of freshly milled grains, and the soft texture that makes homemade sandwich bread so enjoyable.
Whether you’re new to sourdough or simply looking for a dependable everyday loaf, I think you’re going to love this one.
If you’d like to see exactly how I shape the loaves and what the dough should look like at each stage, be sure to watch the full YouTube video below. Seeing the shaping process can make all the difference when you’re learning to make sandwich bread with freshly milled flour.
Sourdough Honey Wheat Sandwich Bread
Ingredients
Equipment
Notes
- This dough is intentionally a little sticky. Resist the urge to add extra flour during shaping. Using damp hands and a damp work surface makes the dough much easier to handle.
- If using freshly milled flour, allow it to cool slightly after milling before mixing the dough.
- For a slower fermentation, reduce the yeast to ½ teaspoon.
- Watch my YouTube video above for a visual demonstration of the shaping process.
Method
- Add the water, sourdough starter, olive oil, honey, and sea salt to the bowl of a stand mixer. Stir briefly to combine.
- With the mixer running on low speed, gradually add the hard red wheat flour and khorasan flour. Mix until all of the flour is incorporated and no dry spots remain.
- Cover the bowl and let the dough rest for 10 to 30 minutes. This gives the freshly milled flour time to fully absorb the liquid.
- Add the yeast and knead on medium speed for 10 to 12 minutes, or until the dough looks smooth and elastic. The dough should be smooth, elastic, and tacky but not overly wet.
- Transfer the dough to a lightly oiled bowl. Cover and let rise for about 3 hours, or until doubled in size.
- Lightly grease two loaf pans or line them with parchment paper.
- Lightly dampen your countertop, hands, and bench scraper. Turn the dough out onto the counter and divide it evenly into two portions.
- Gently press one portion into a rectangle about 10 x 7 inches.
- Fold the bottom edge up toward the center. Fold the right side inward, then fold the left side inward.
- Fold the top right corner diagonally toward the center, then repeat with the top left corner to create tension in the dough.
- Starting at the top, tightly roll the dough toward yourself into a loaf shape. Gently pull the loaf toward yourself with your hands or a bench scraper to create additional surface tension.
- Place the shaped loaf into a prepared 9×4 loaf pan and repeat with the remaining dough.
- Cover the pans with a towel and let rise for about 60 minutes, or until the dough is domed and beginning to rise above the top edge of the pans.
- Bake at 375°F (190°C) for 35 minutes, or until golden brown.
- Remove the loaves from the pans and transfer them to a wire rack. Let cool completely before slicing.
Video
This post contains affiliate links. I may earn a small commission at no extra cost to you if you make a purchase through one of these links. I only share products I use and love.
This might be the best sourdough sandwich bread recipe I have ever tried. The dough is easy to work with, great flavor, and the bread stays soft even a day later! I love the texture (and nutrition!) of milled grains. This is the recipe I will have on repeat!
love hearing this! So glad you loved it!
I’ve made a number of whole wheat sandwich loaves and this recipe is my favorite! Love the little addition of yeast with the sourdough. I can tell by the flavor there’s been some fermentation, but it’s much lighter and crispier when toasted than 100% sourdough leavened sandwich loaves. Will definitely make again!
Can I use maple syrup instead of honey?
Can i use only stone ground wheat flour only or sprouted spelt?
I love following you and your receipes. I have made several of them.
Thank you for answering my questions when time allows you.
Best,
Hi! You can but I haven’t tried it, it may taste a little different. Sprouted spelt is better for muffins, cakes, cookies, etc. since it has a lower protein content. I would stick with hard red wheat, hard white, or kamut for this recipe.
Where do I get the apron you are wearing?
Where do I get the apron you are wearing?
Also can I use 9 by 5 pan for this recipe
Hi! Yes you can use a 9×5 pan, the loaves will be slightly shorter but it still works! The apron I most often wear in my videos is this one: https://on.ltk.com/+81b_vPx6WJKZCnp_CfWD2w
I haven’t tried this recipe yet, but I’m looking forward to trying it for my husband’s sandwiches instead of store bought bread!
One question I do have is: do you use instant yeast like some of your other roll recipes? Or do you use active dry yeast?
Thank you 🤗